¶ Navigation
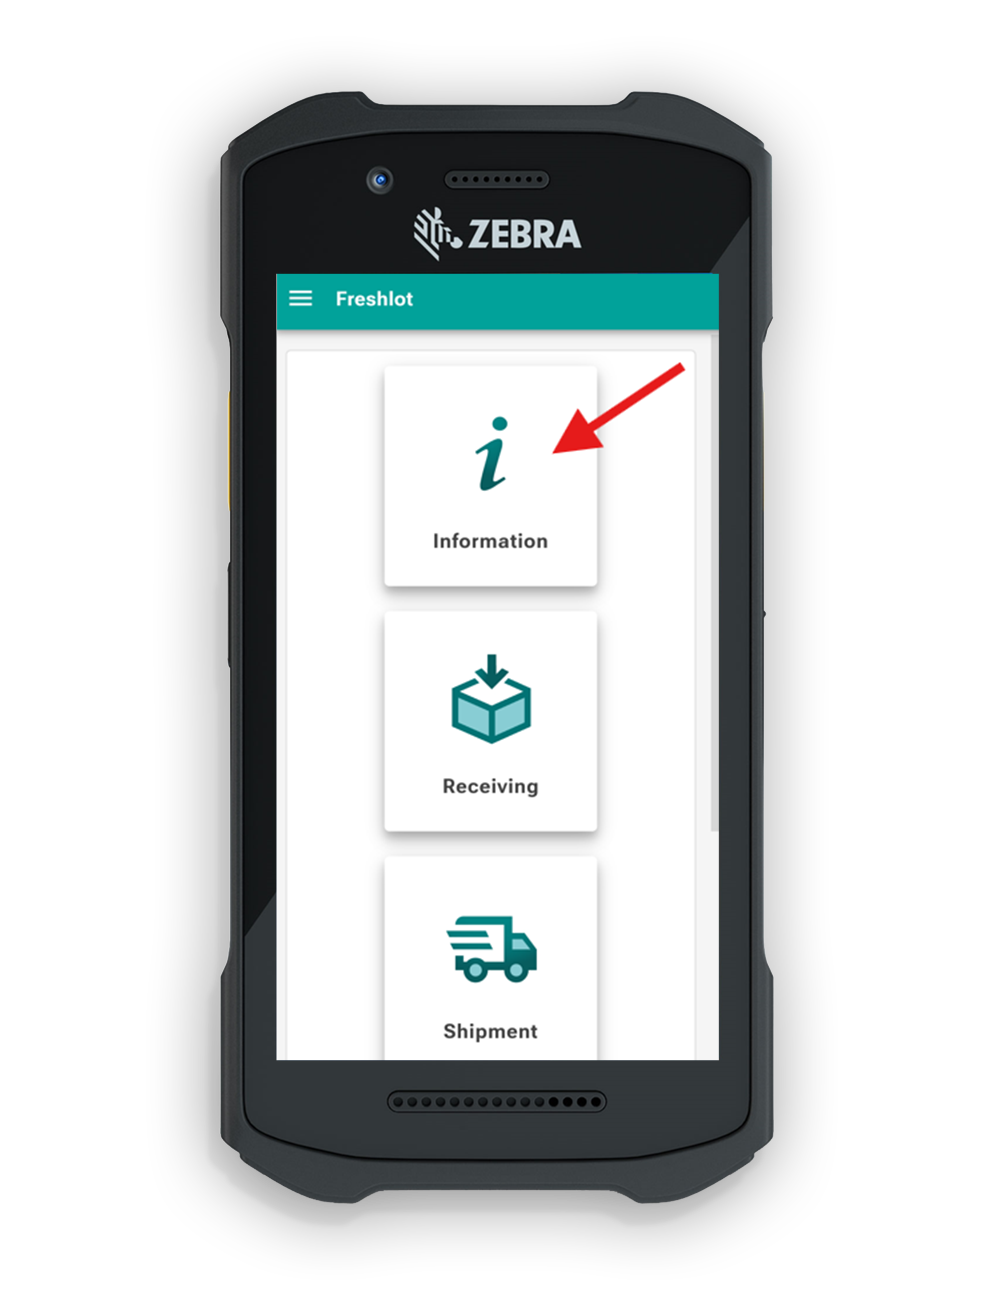
After logging in to FreshLot, the user is redirected to the main menu.
Select Information from the main menu to open the Information module.
¶ Item search
The Information page contains a search field where the user can scan or enter any of the following:
- Item code
- Bin code
- Package number
FreshLot automatically identifies the type of code entered and displays the corresponding information.
1. User either scans or enters Item/Package/Bin code into the search field to to proceed further.
2. If user needs to look up multiple items or bins that start with a specific number or character combination, This can be performed using the asterisk (*) symbol.
Example: Looking up items starting with Item No. 1.50*
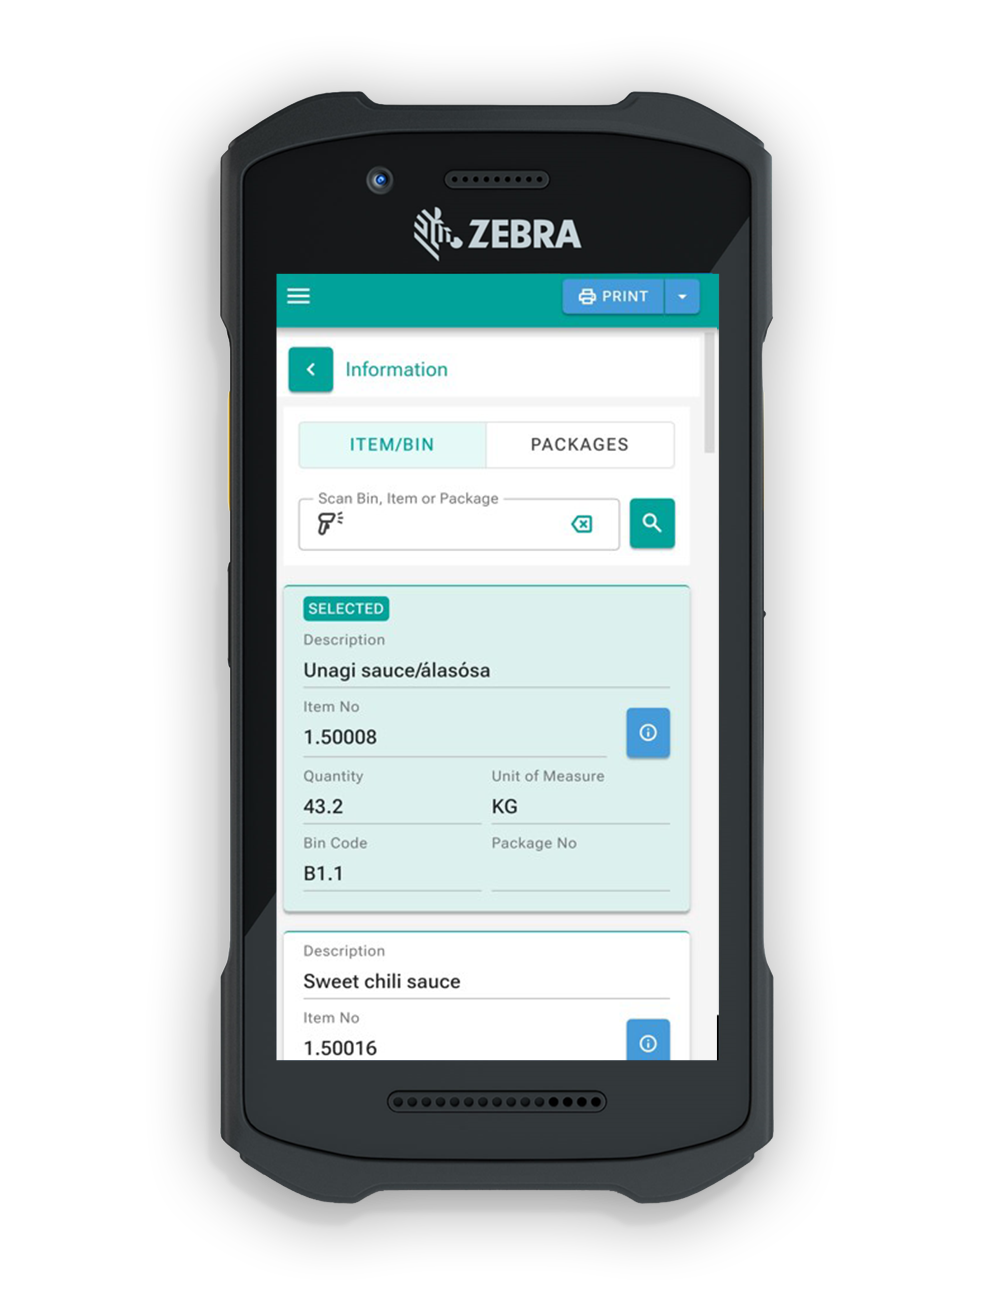
3. If user scanned an item, the system will populate information such as: Description, Lot No, Expiration Date, Bin Code, Quantity and UOM.
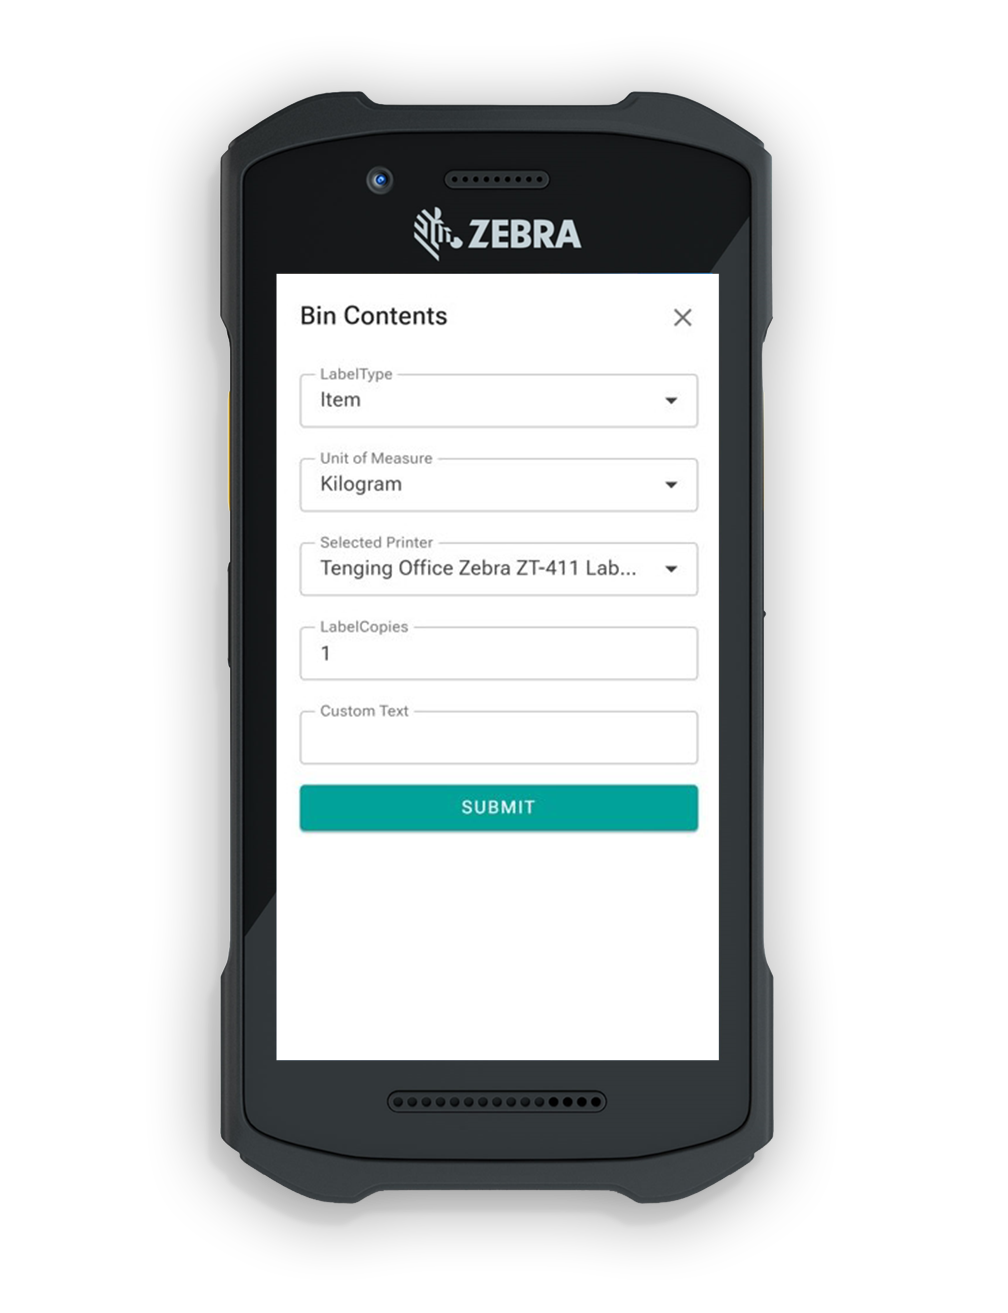
4. User can choose to print out any of the labels by selecting one of the items , entering the amount of copies. To print out labels, user needs to click on "Print Labels" button.
5. After clicking the "Print Labels" button pop-up will appear with the print information that user will need to fill out in order to print out the labels. User will need to define the Unit of measure and how many copies of labels he wants to print out. After input, user needs to click on the Print button and labels will print out on designated printer.
¶ Label Printing
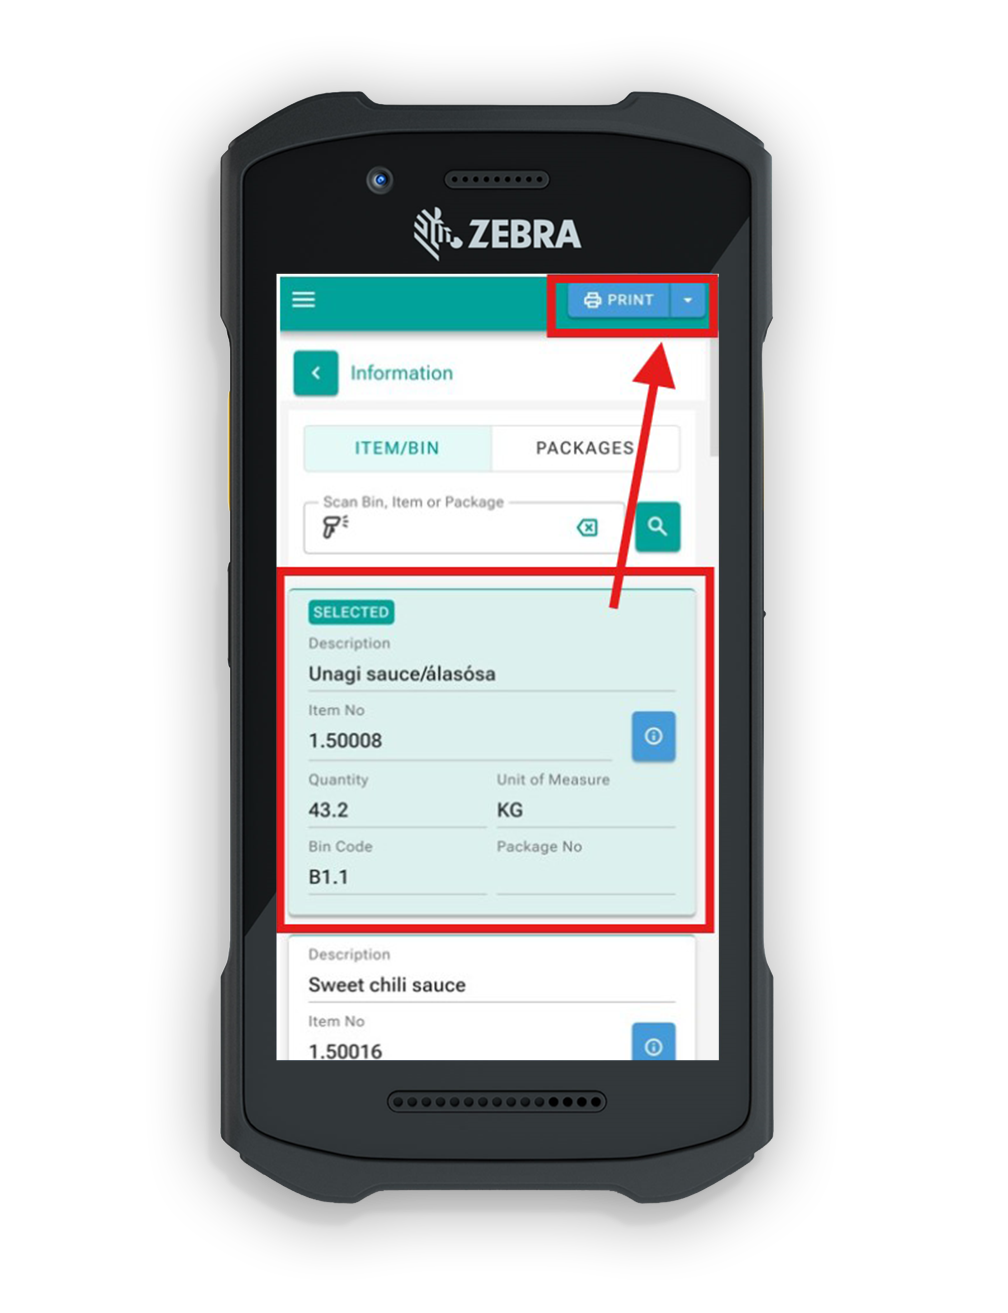
To print a label, select one of the records displayed in the search results.
After a record is selected, the Print Labels button becomes available.
Depending on the type of code entered, the system may display the following information:
- Item No.
- Description
- Lot No.
- Expiration Date
- Bin Code
- Quantity
- Unit of Measure (UOM)
The displayed information can be viewed but cannot be edited from this page.
¶ 1. Select a record for printing
To print a label, select one of the records displayed in the search results.
After a record is selected, the Print Labels button becomes available.
¶ 2. Configure the label
Click the Print Labels button to open the label configuration window.
Depending on the selected record, the user may need to define the following:
- Label type, such as Item or Bin
- Unit of Measure
- Number of label copies
¶ 3. Print or cancel
Click Print to send the labels to the designated printer.
Click Cancel to close the window without printing.
After clicking the "Print Labels" button, pop-up will appear with the print information that user will need to fill out in order to print out the labels. User defines how many copies of labels he wants to print out. After input, user needs to click on the Print button and labels will print out on designated printer.
¶ Package search
1. If user scanned or entered a Package No., the system will populate information such as: Item No., Description, Lot No, Expiration Date, Bin code, QTY and UOM regarding to all of the items located within that specific bin.
2. User can choose to print out any of the labels by selecting one of the packages. To print out labels, user needs to click on the item and click on "Print Labels" button.
3. After clicking the "Print Labels" button pop-up will appear with the print information that user will need to fill out in order to print out the labels. User will need to select how many copies of labels he wants to print out. After input, user needs to click on the Print button and labels will print out on designated printer.