¶ What is the Production module?
The purpose of this module is to help production and warehouse users process manufacturing tasks through FreshLot, while keeping the related information synced with Business Central.
Production helps users view production orders, check required components, transfer needed materials, record produced quantities, and update production results through a simpler UI connected to BC.
The production process is based on Firm Planned and Released Production Orders in Business Central.
¶ Production
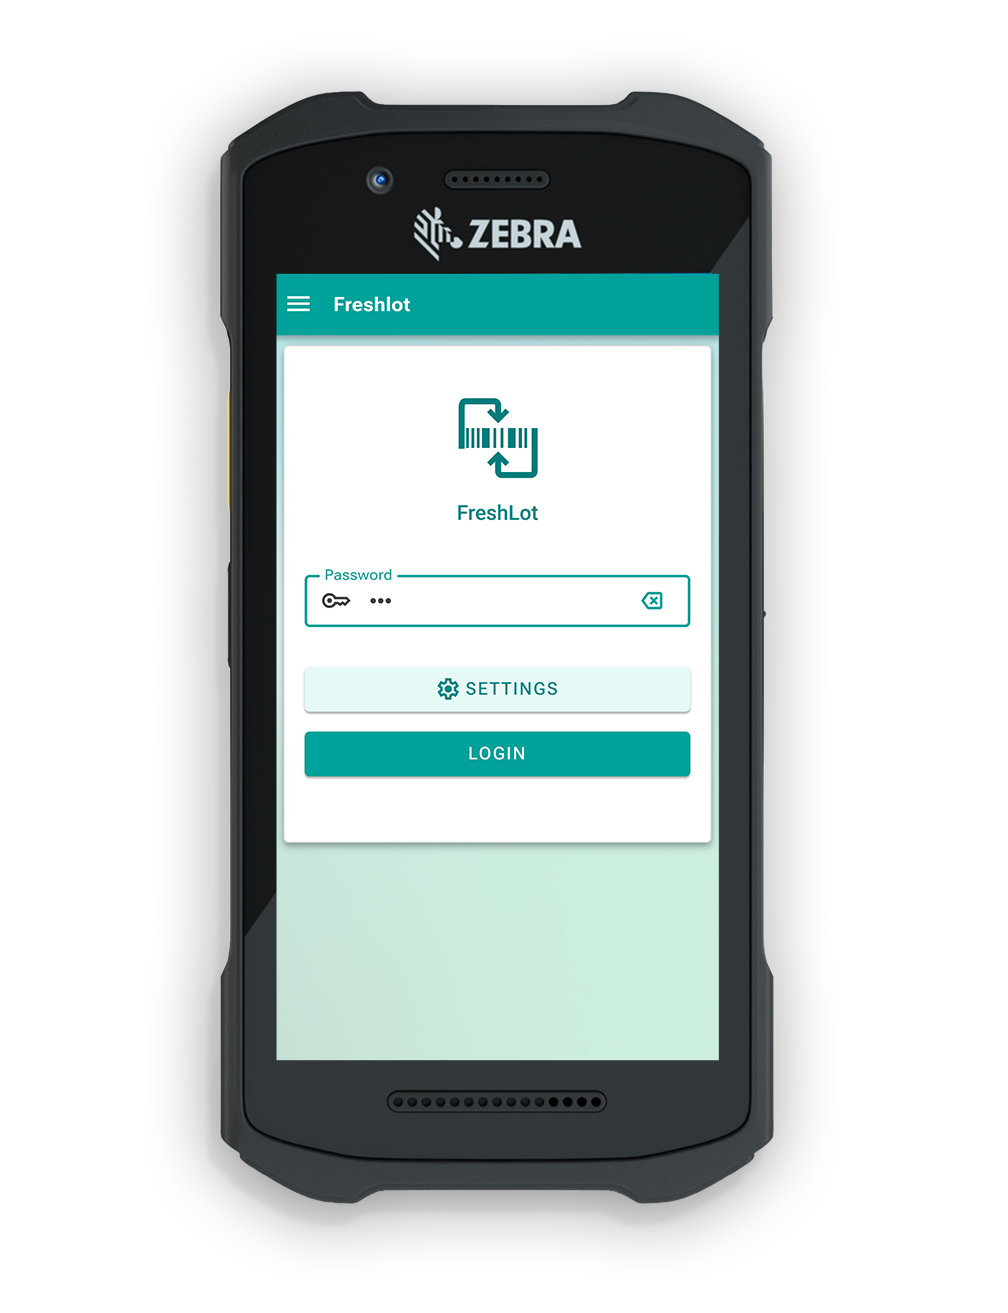
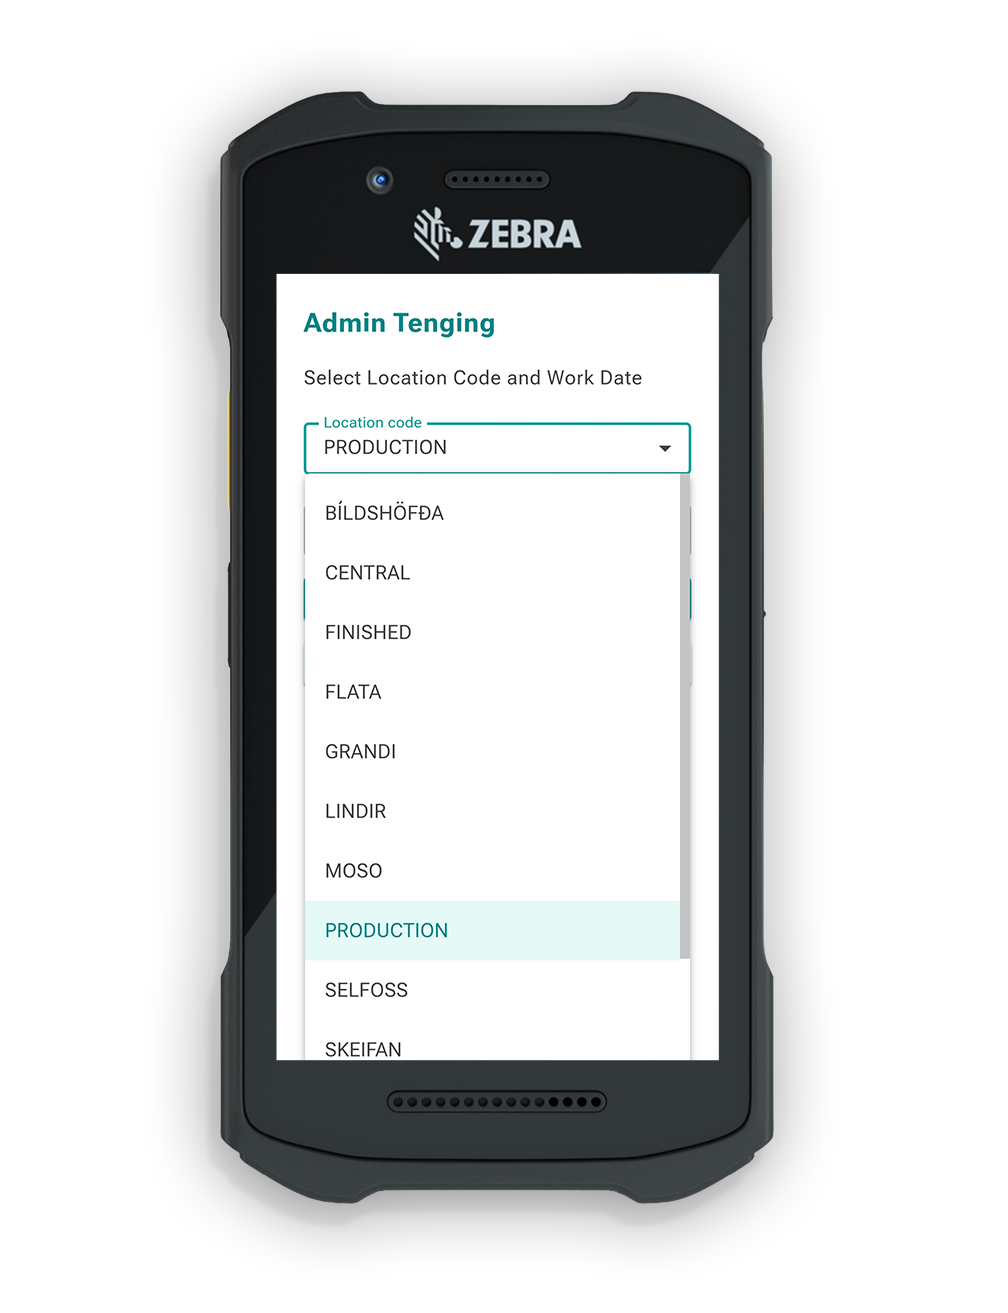
The user has to login to FreshLot and ensure that the production location is selected.
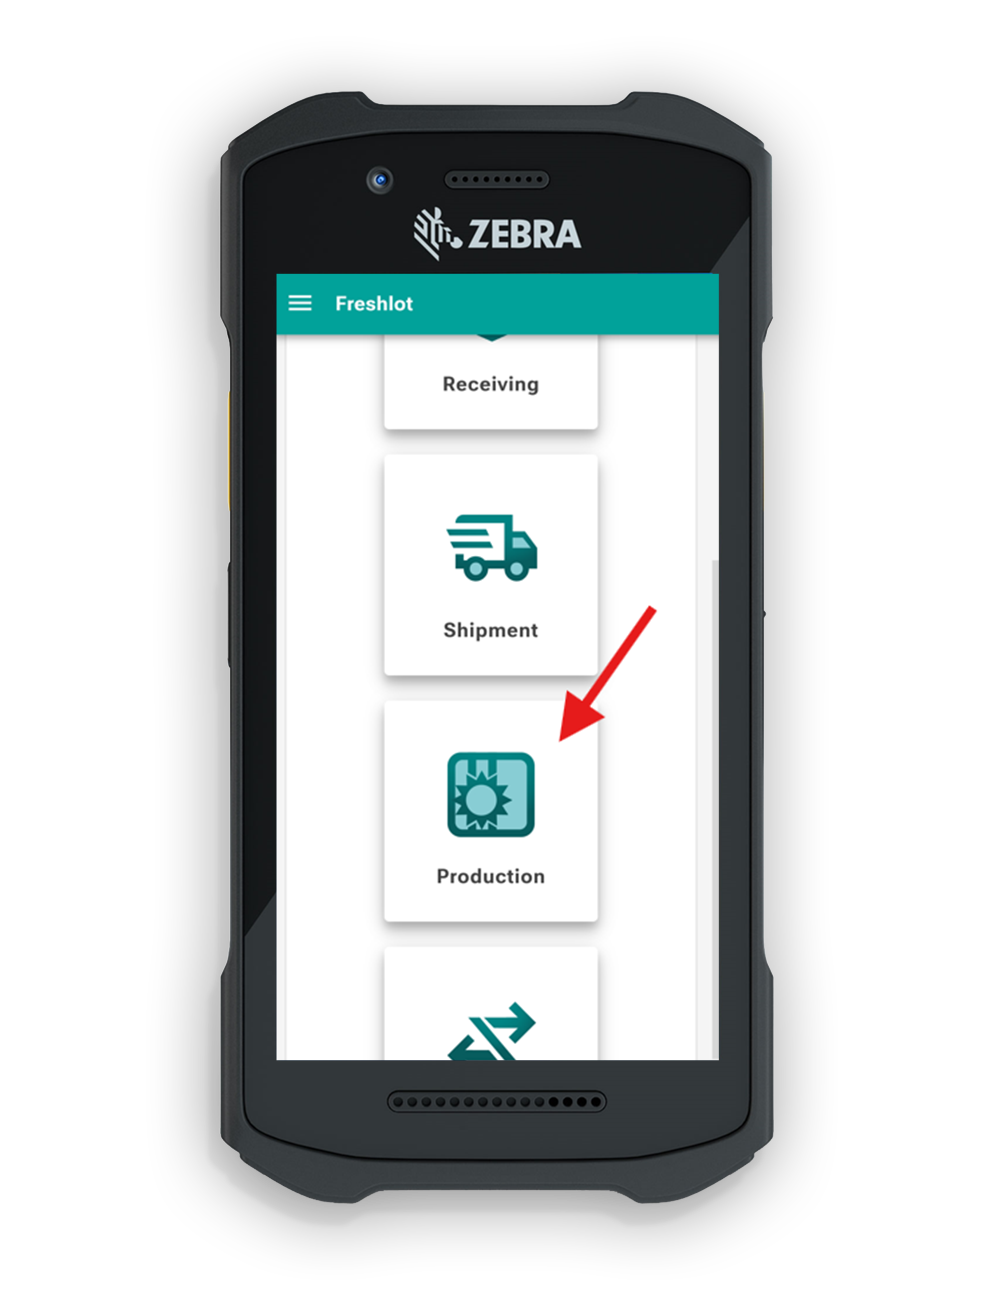
On the main menu screen, click the Production button to proceed with production-related functions.
¶ Firm planned
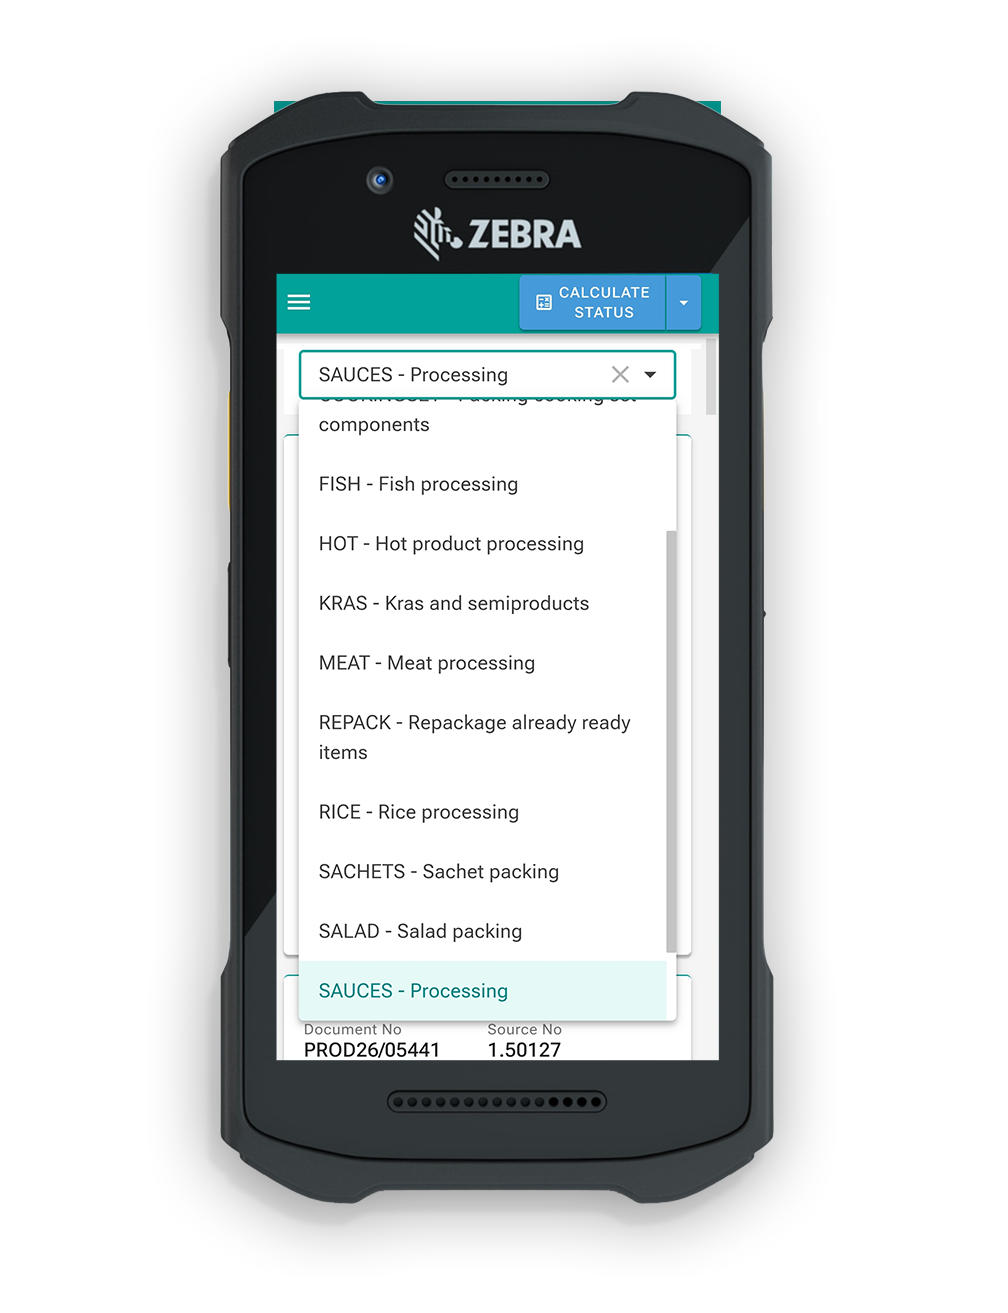
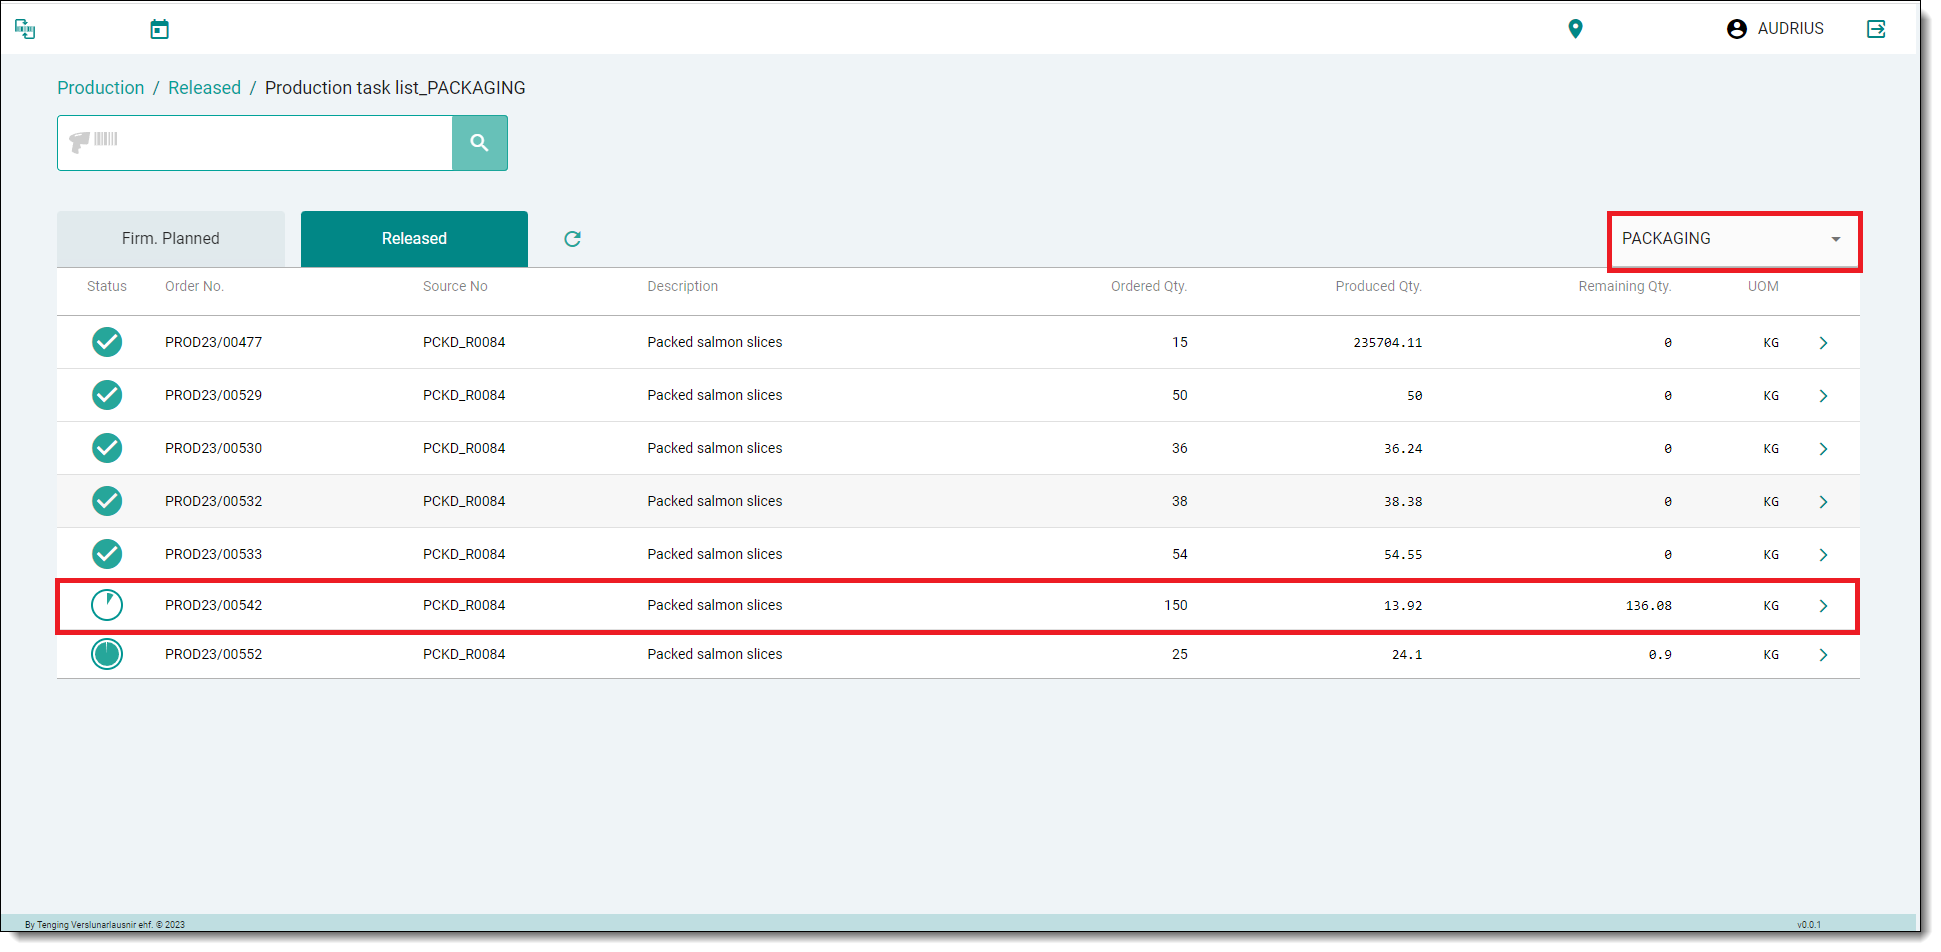
1. After navigating to Production, a Production task list will be opened. Tasks are then listed under the 2 statuses "Firm Planned" and "Released."
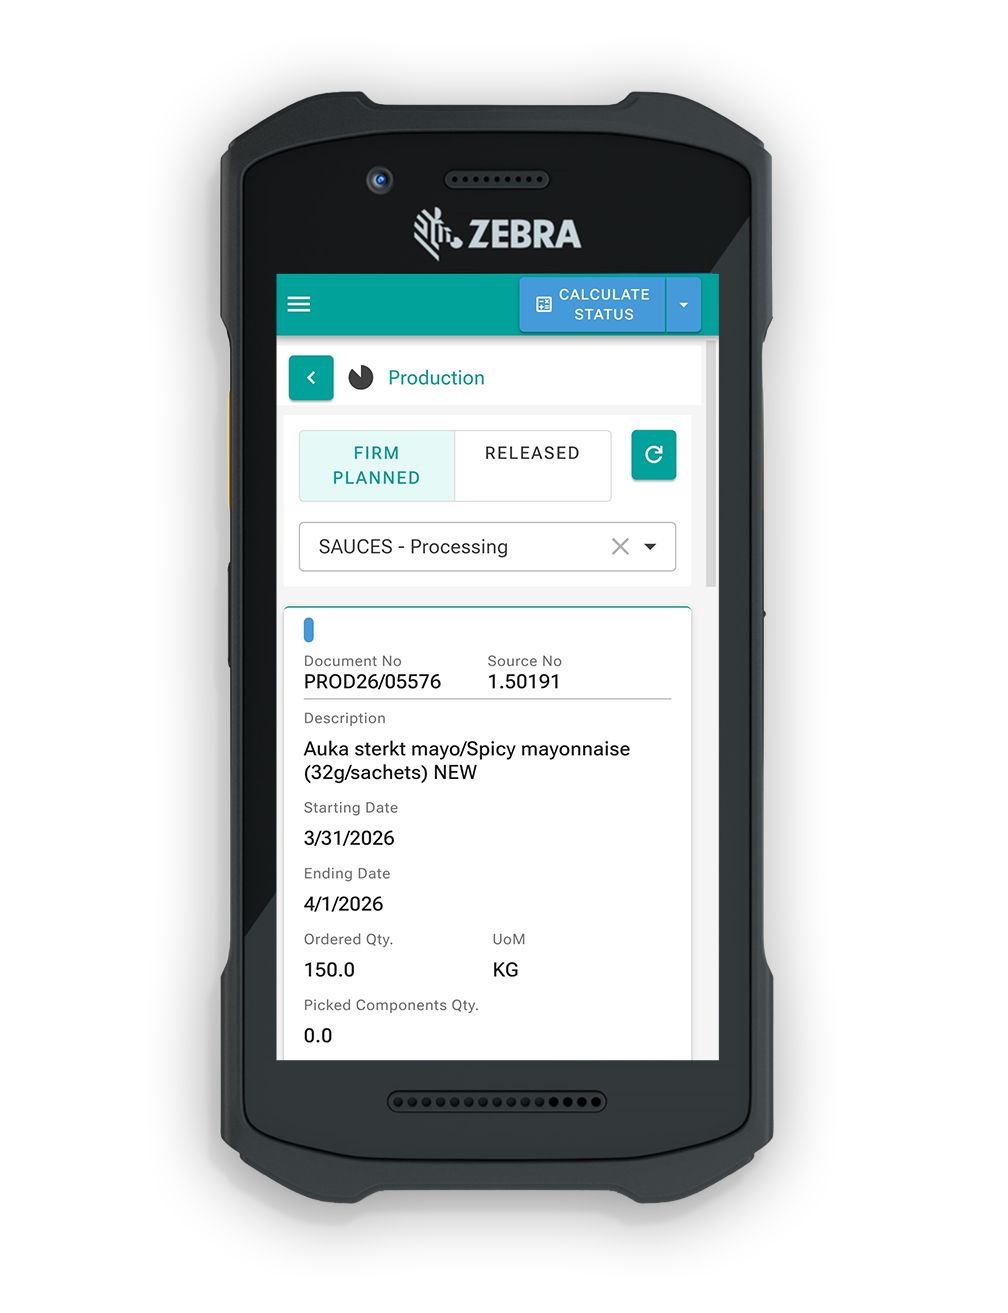
2. The user can choose to filter these tasks by choosing a specific category of products on the right-hand side. The list will be generated from existing groups.
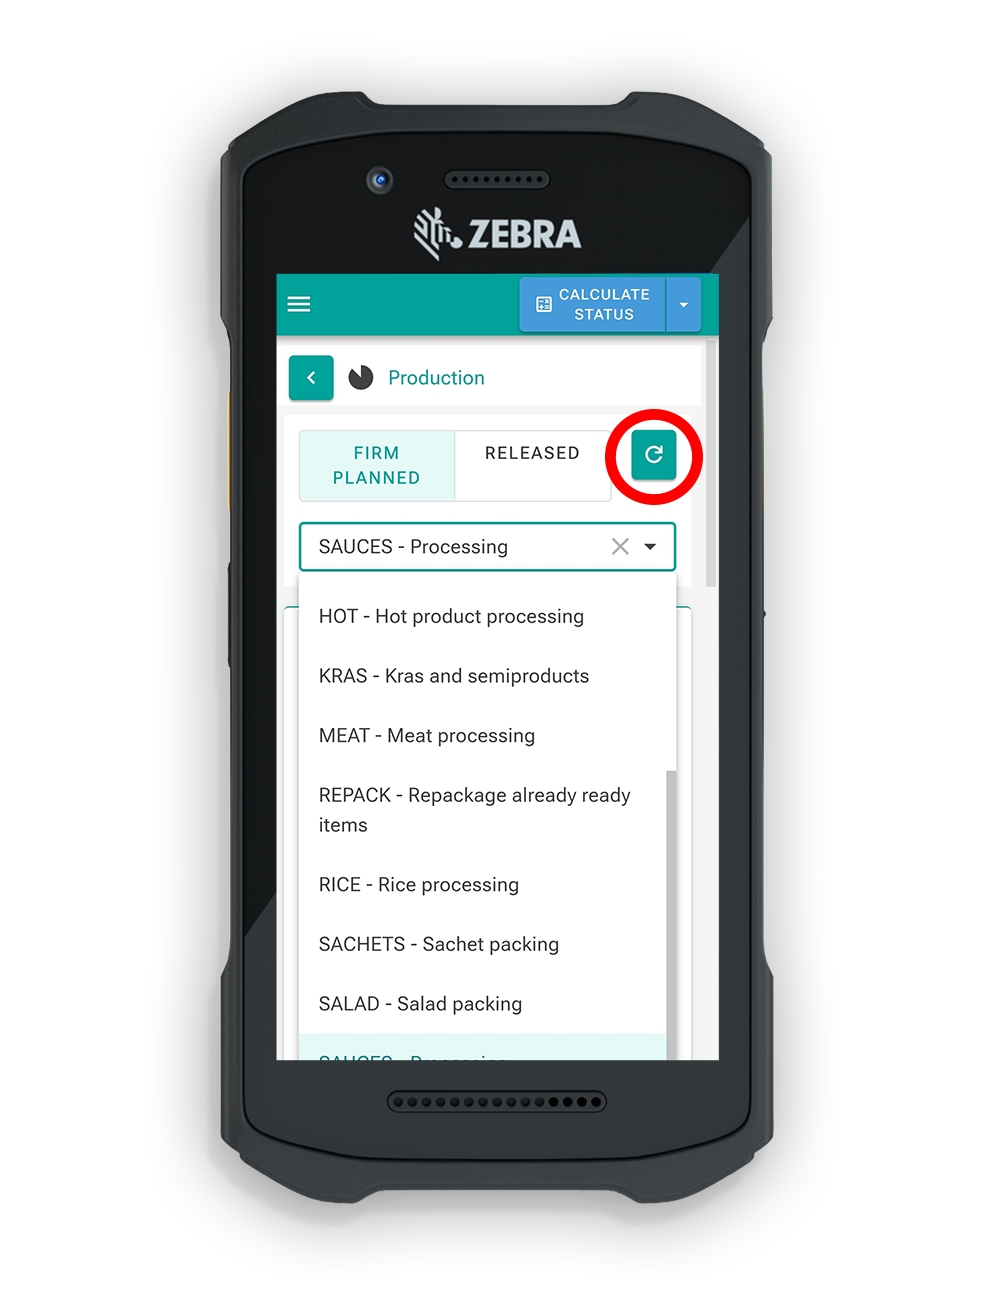
3. If any new tasks come in while the production task list is opened, the user is able to easily refresh the list by pressing the refresh button.
4. A task can be printed by opening the task and selecting "Print". The task will include all the information regarding the component information and data.
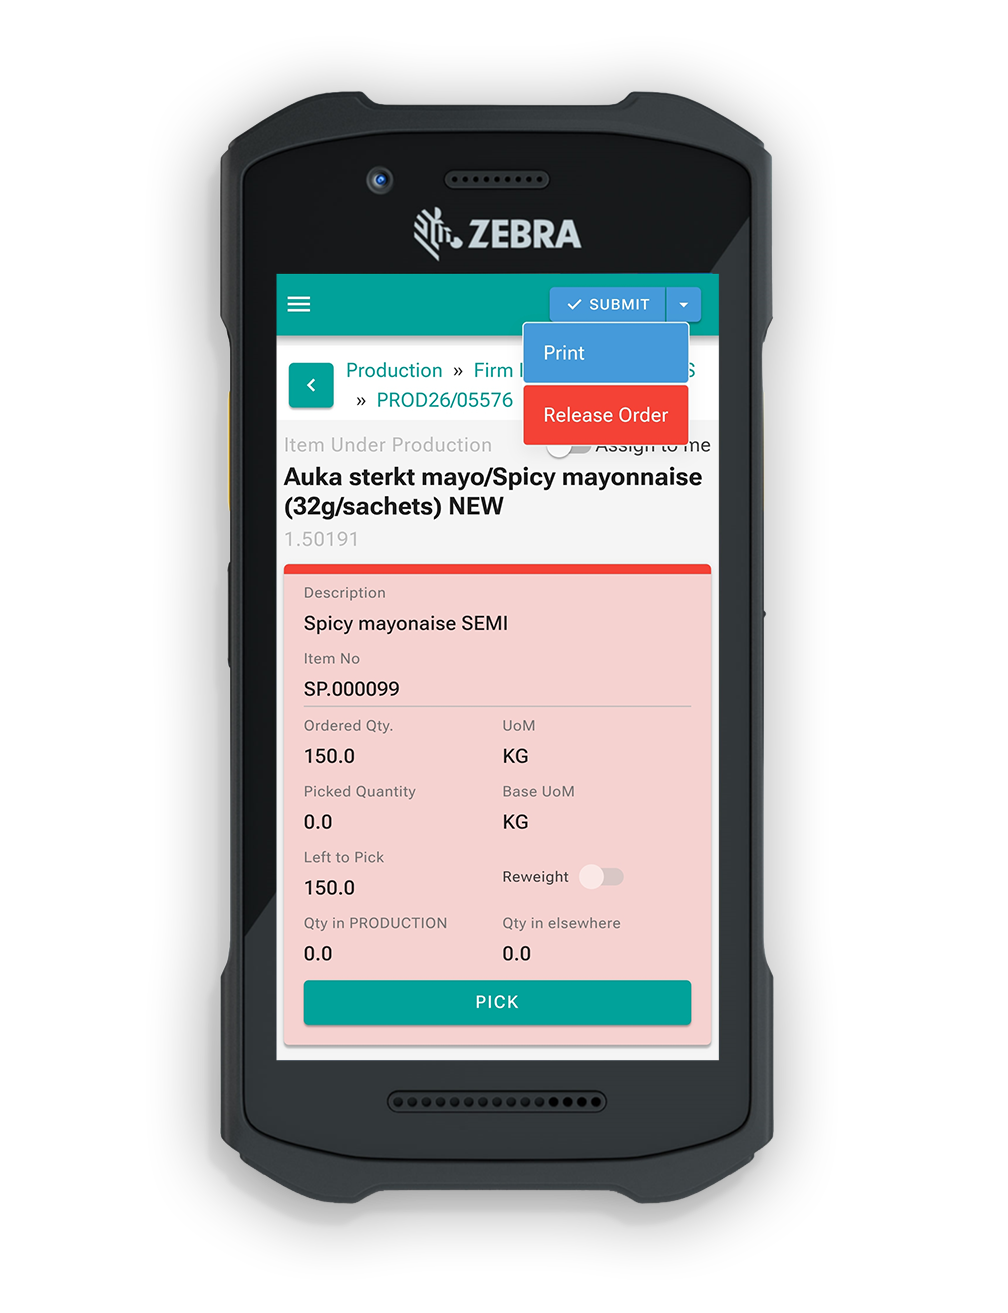
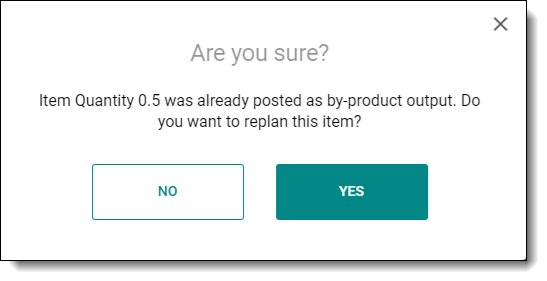
4.1. In certain cases when orders are released and the by-products quantity is increased, the system could prompt the user a message asking if they want to use those by-products from another order that has been finished.
5. A .pdf format file will be created and printed.
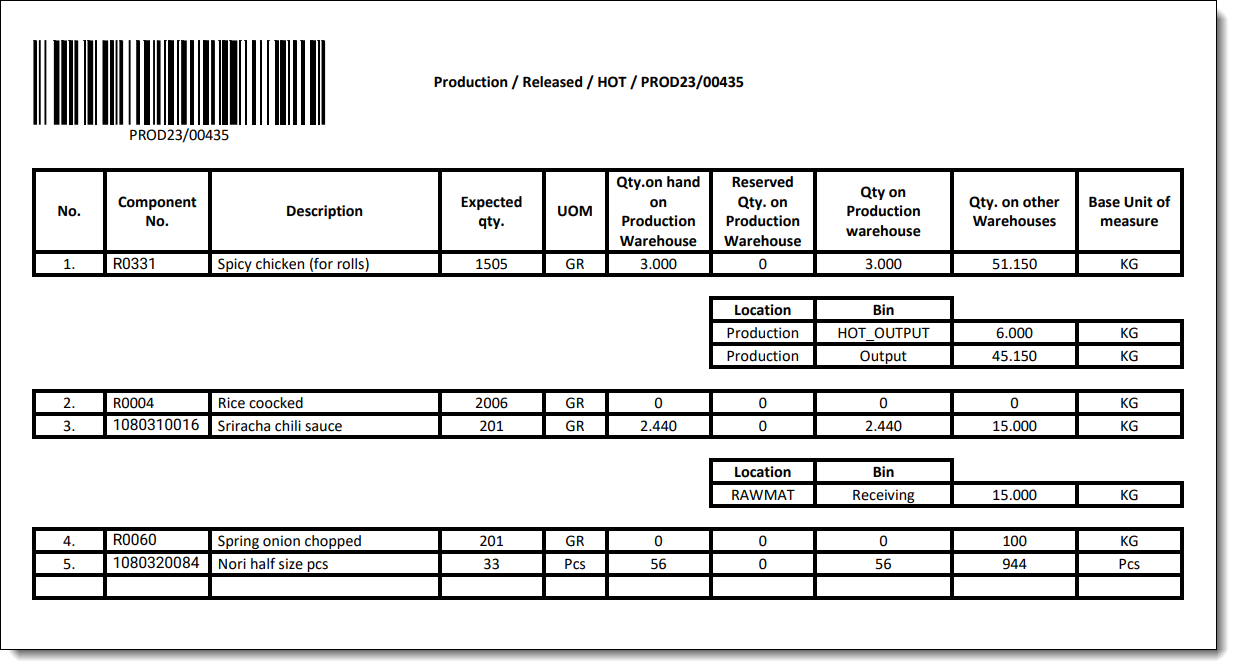
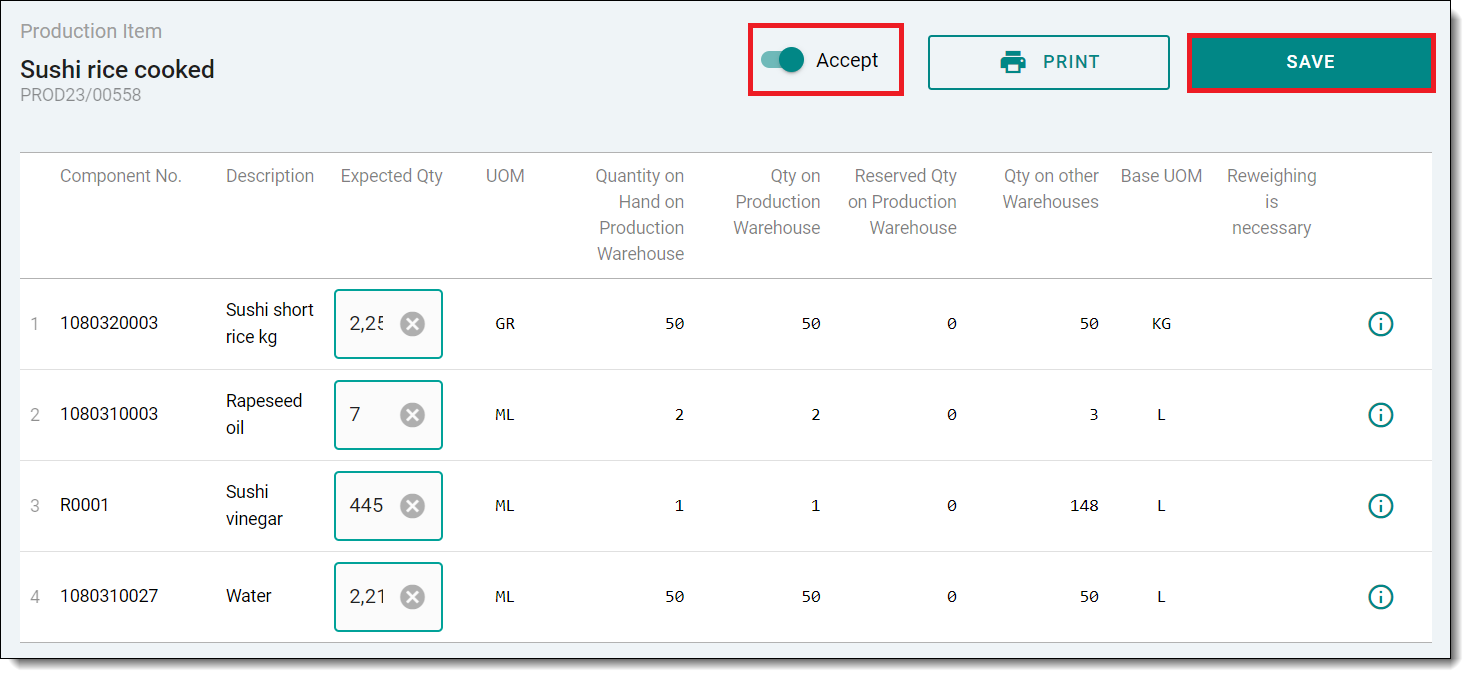
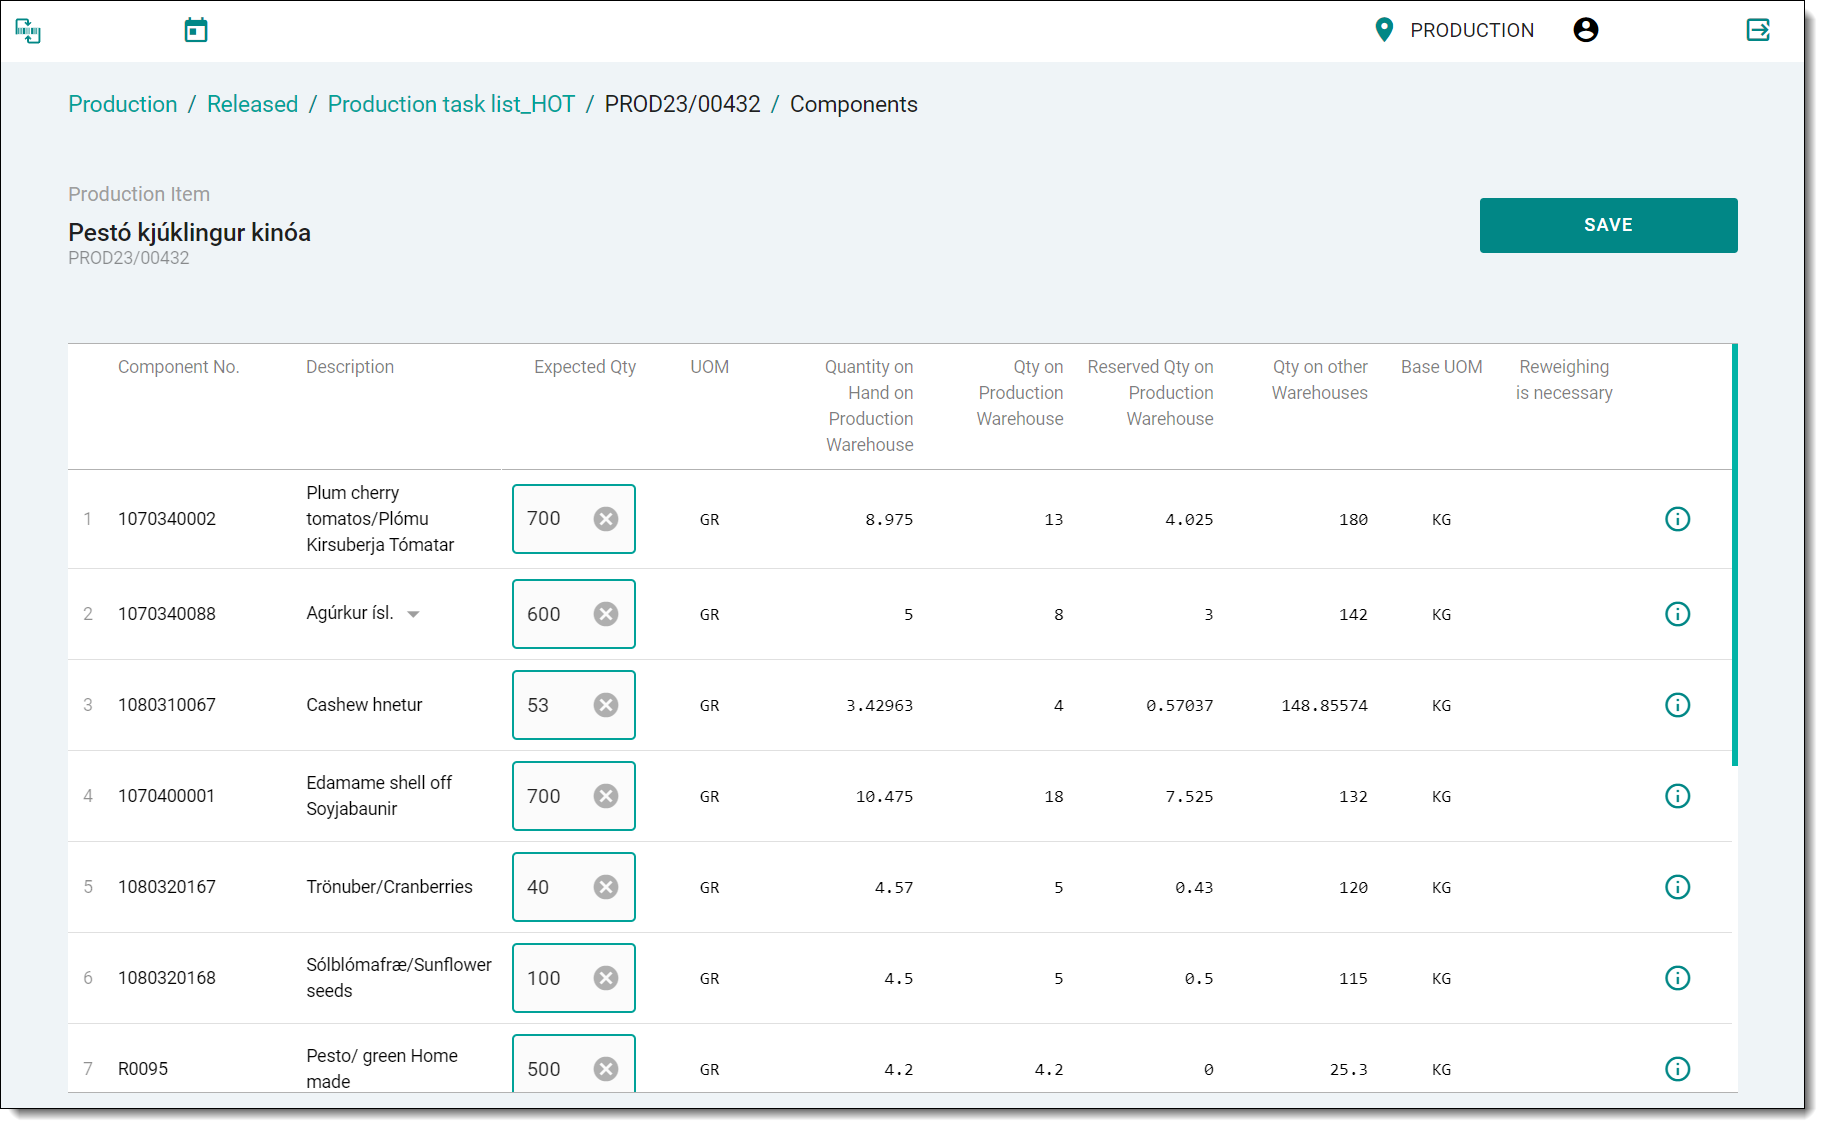
6. If the user will proceed further with the previously-opened window, the system will populate a bill of materials (BOM).
7. The Expected Qty is calculated based on the Quantity. This information can be seen on the first page of production. The user can follow the path above. The BOM also keeps an acitve list of Quantity available in Production
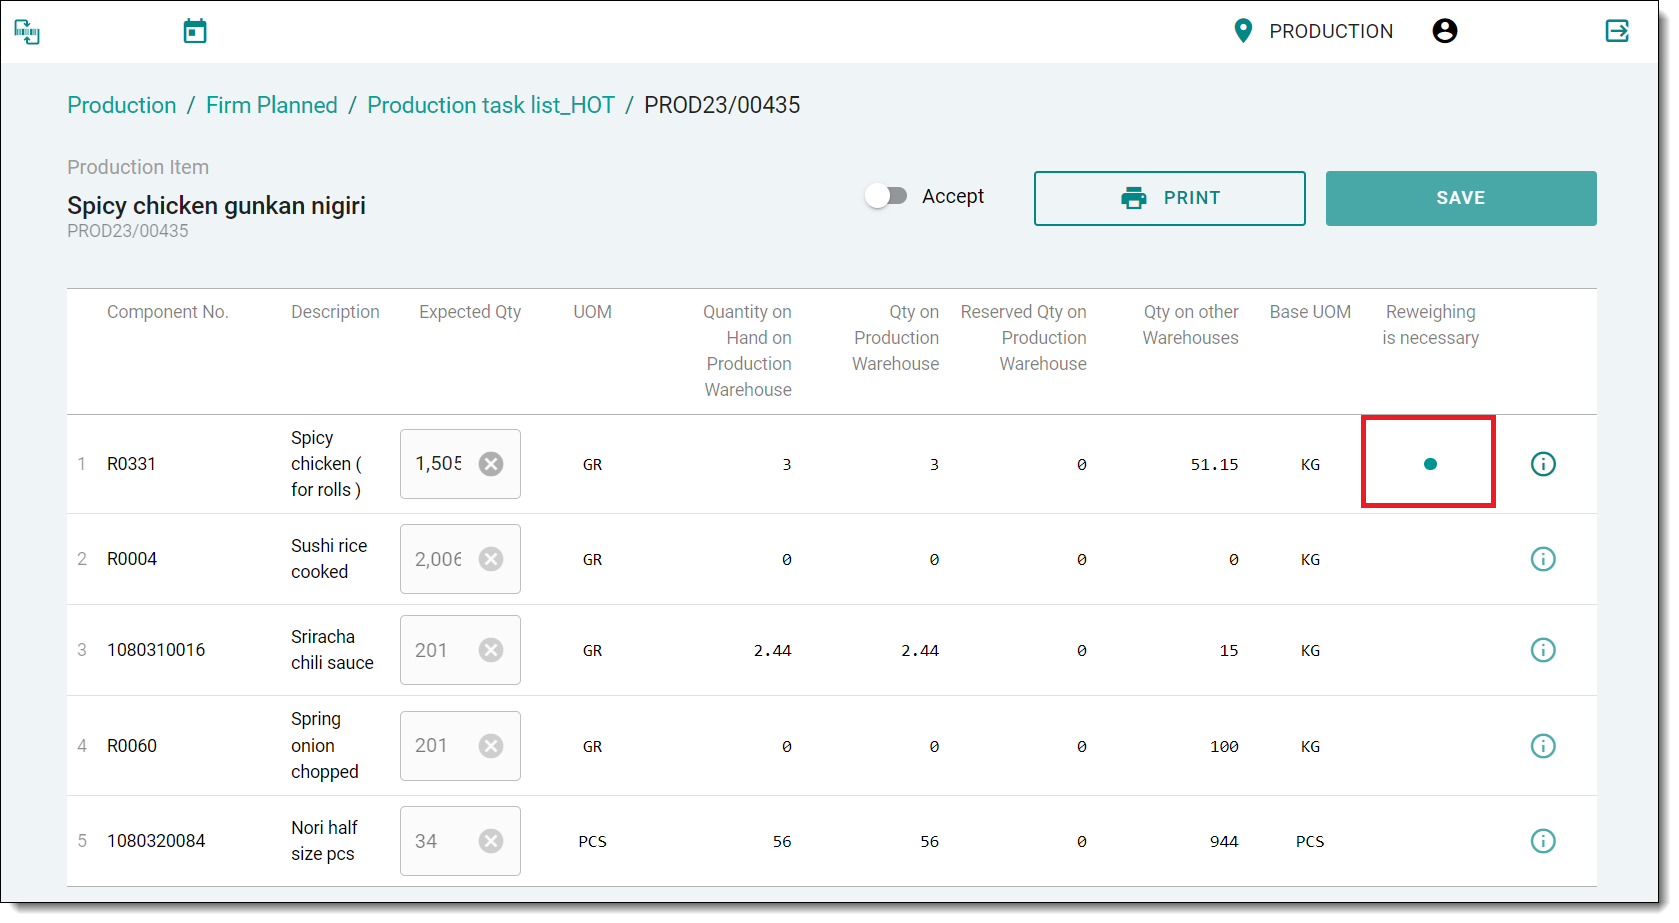
8. Some of the components can have Re-weighing is necessary toggled on. In that case, the user will weight the component and, if needed, make changes to the Expected Qty. The remaining components will be recalculated by the weighted component and confirming its' weight. Without defining the item weight, the user won't be able to proceed further. Weight item holds advantage against all other items.
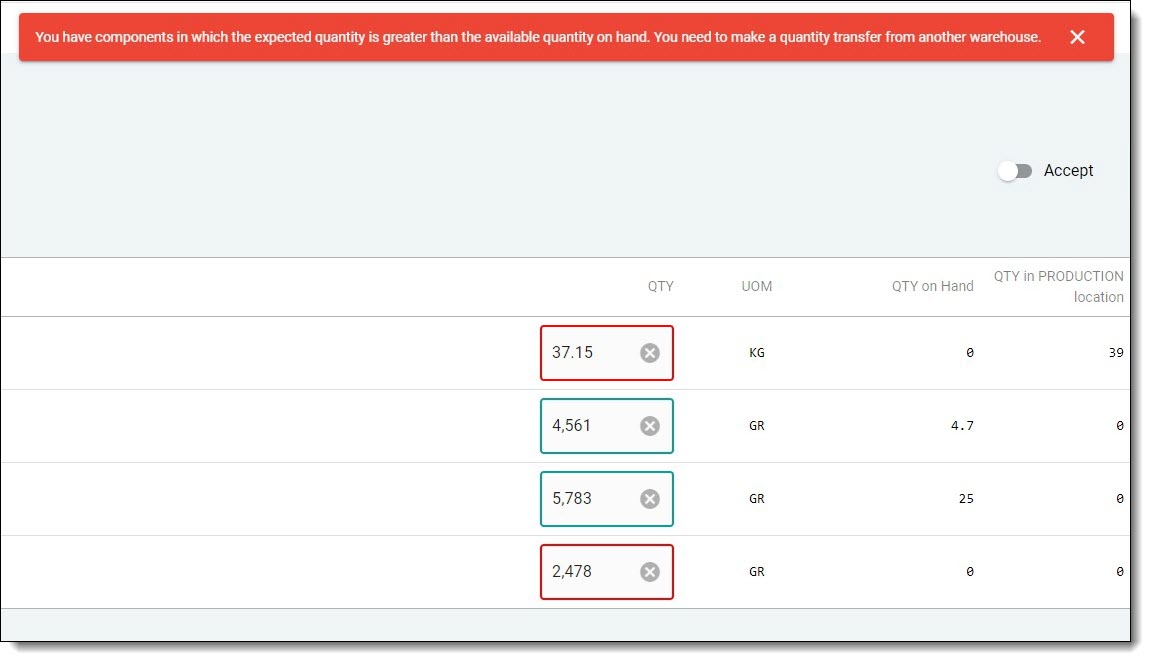
9. If the production warehouse does not have the Expected Qty for the production task, an error will be displayed indicating that a quantity transfer needs to be made from another warehouse in order fulfill the task.
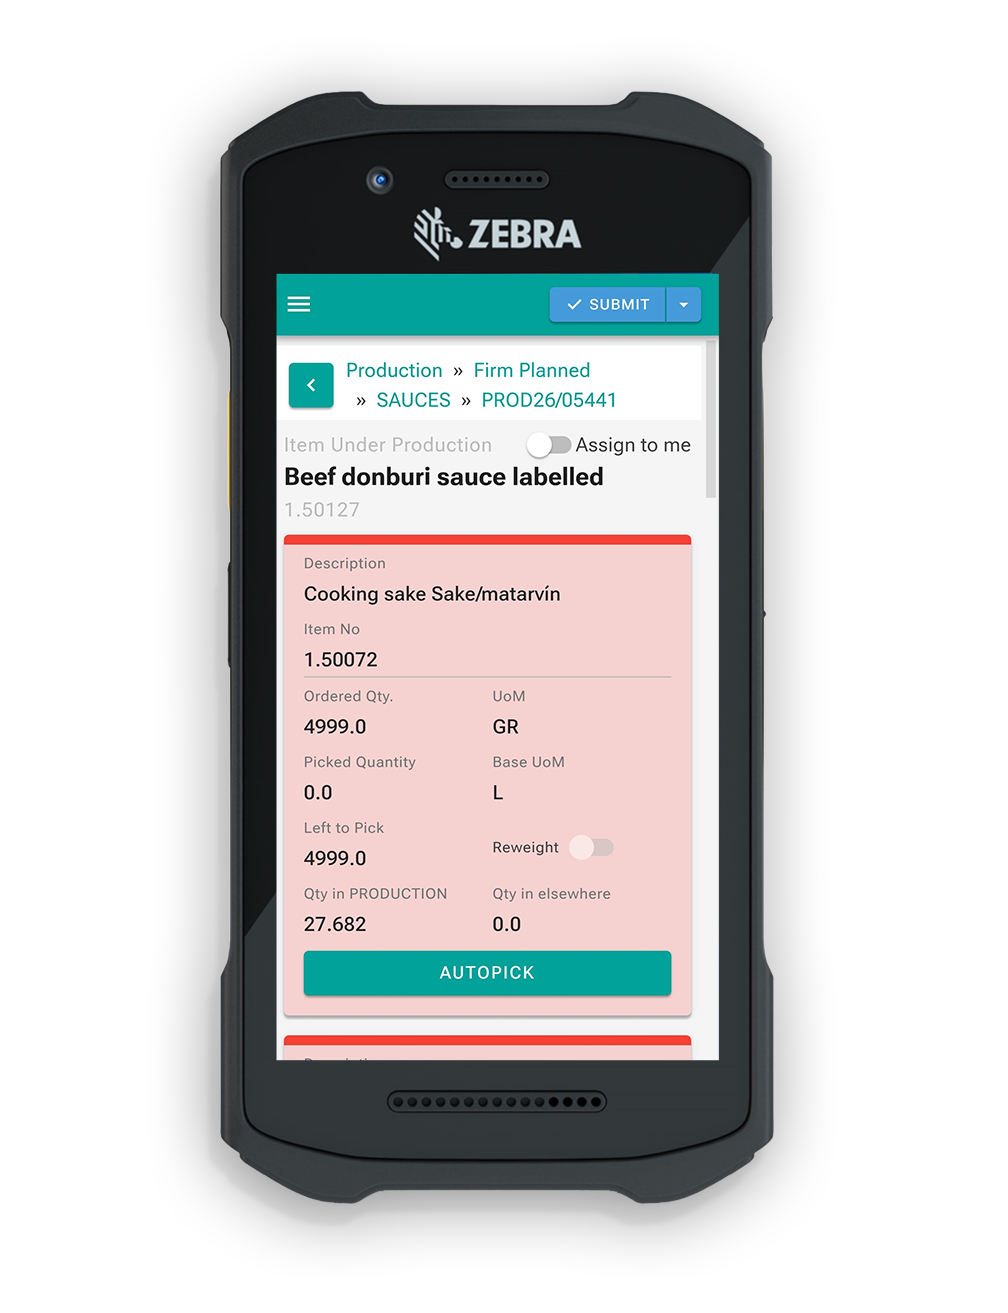
10. The user can easily determine whether the component is in stock by clicking the Information (i) icon. The information icon can be found on the right-hand side of the item. The component information field is populated by a QR code that can be read by a phone camera or a scanner (in the case that there isn't a designated tool that the employee can work with). By using 3rd-party tools or devices, the user will be able to see the same page and use the same functionalities.

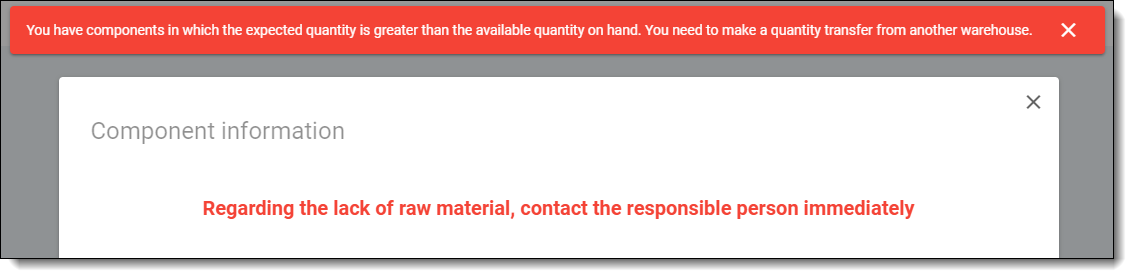
10.1. In some scenarios, the user will see a different pop-up window after pressing on the Information (i) button. This indicates that the following component does not have any value in any given location - it needs to be ordered.
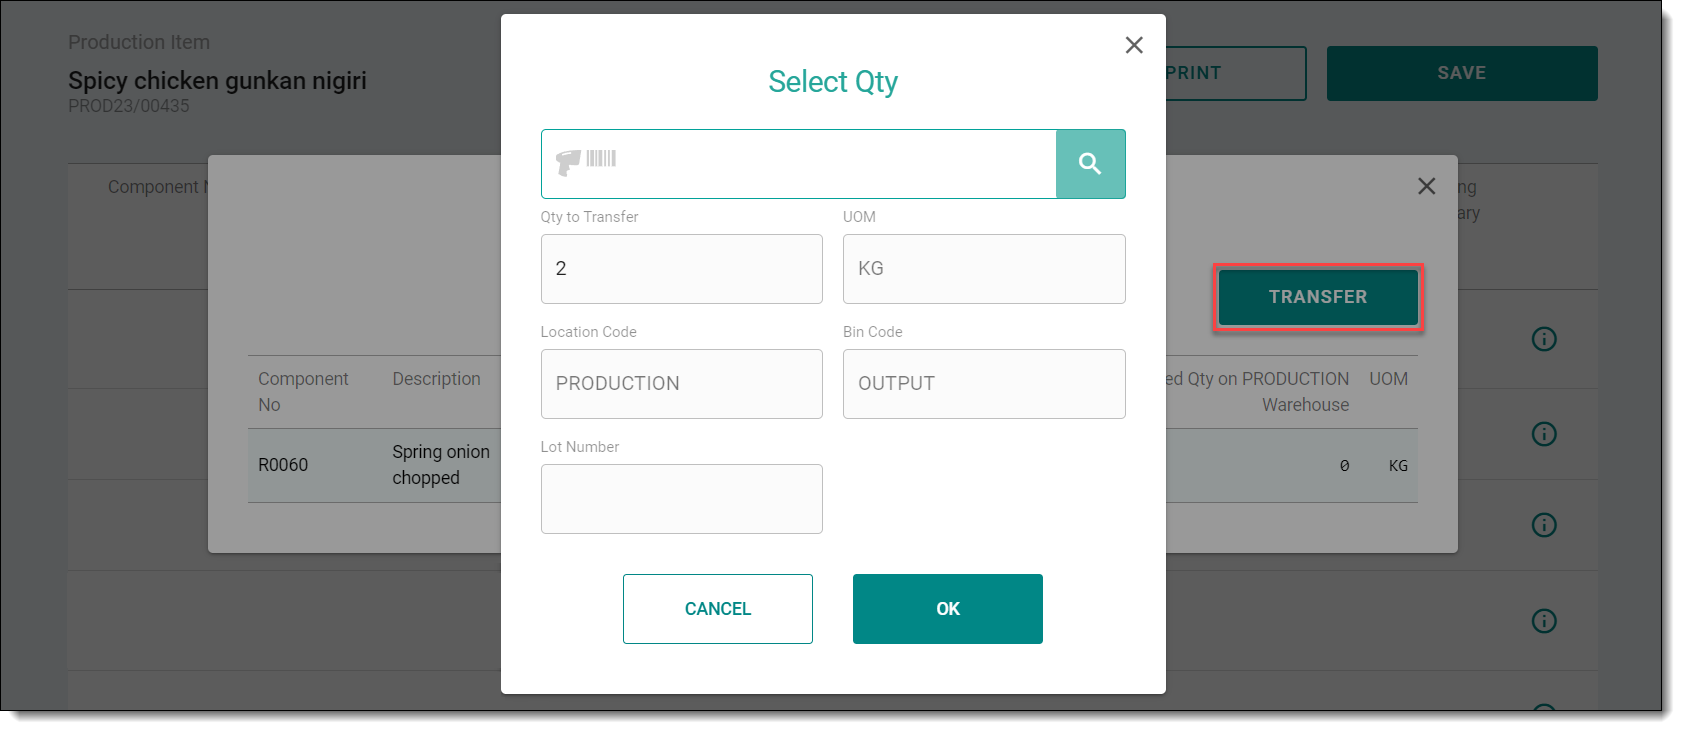
11. The user can then choose to transfer some of the components to the production warehouse by clicking Transfer. This will require the user to fill out all of the needed information in regards to the transfer.
12. The user can now see the Quantity on Hand on Production Warehouse value updated accordingly to the quantity that was transferred.
13. When the production warehouse has enough quantity on hand for the components, the user can then proceed to accept the order and save the changes. When a user takes the production order (Firmly planned / Accepted), the system removes it from the list, meaning it will not visible for a designated amount of time. If during designated time the employee does not transfer it to Released, the reservation for the employee will be terminated and the production order will be visible again on the list.
¶ Released
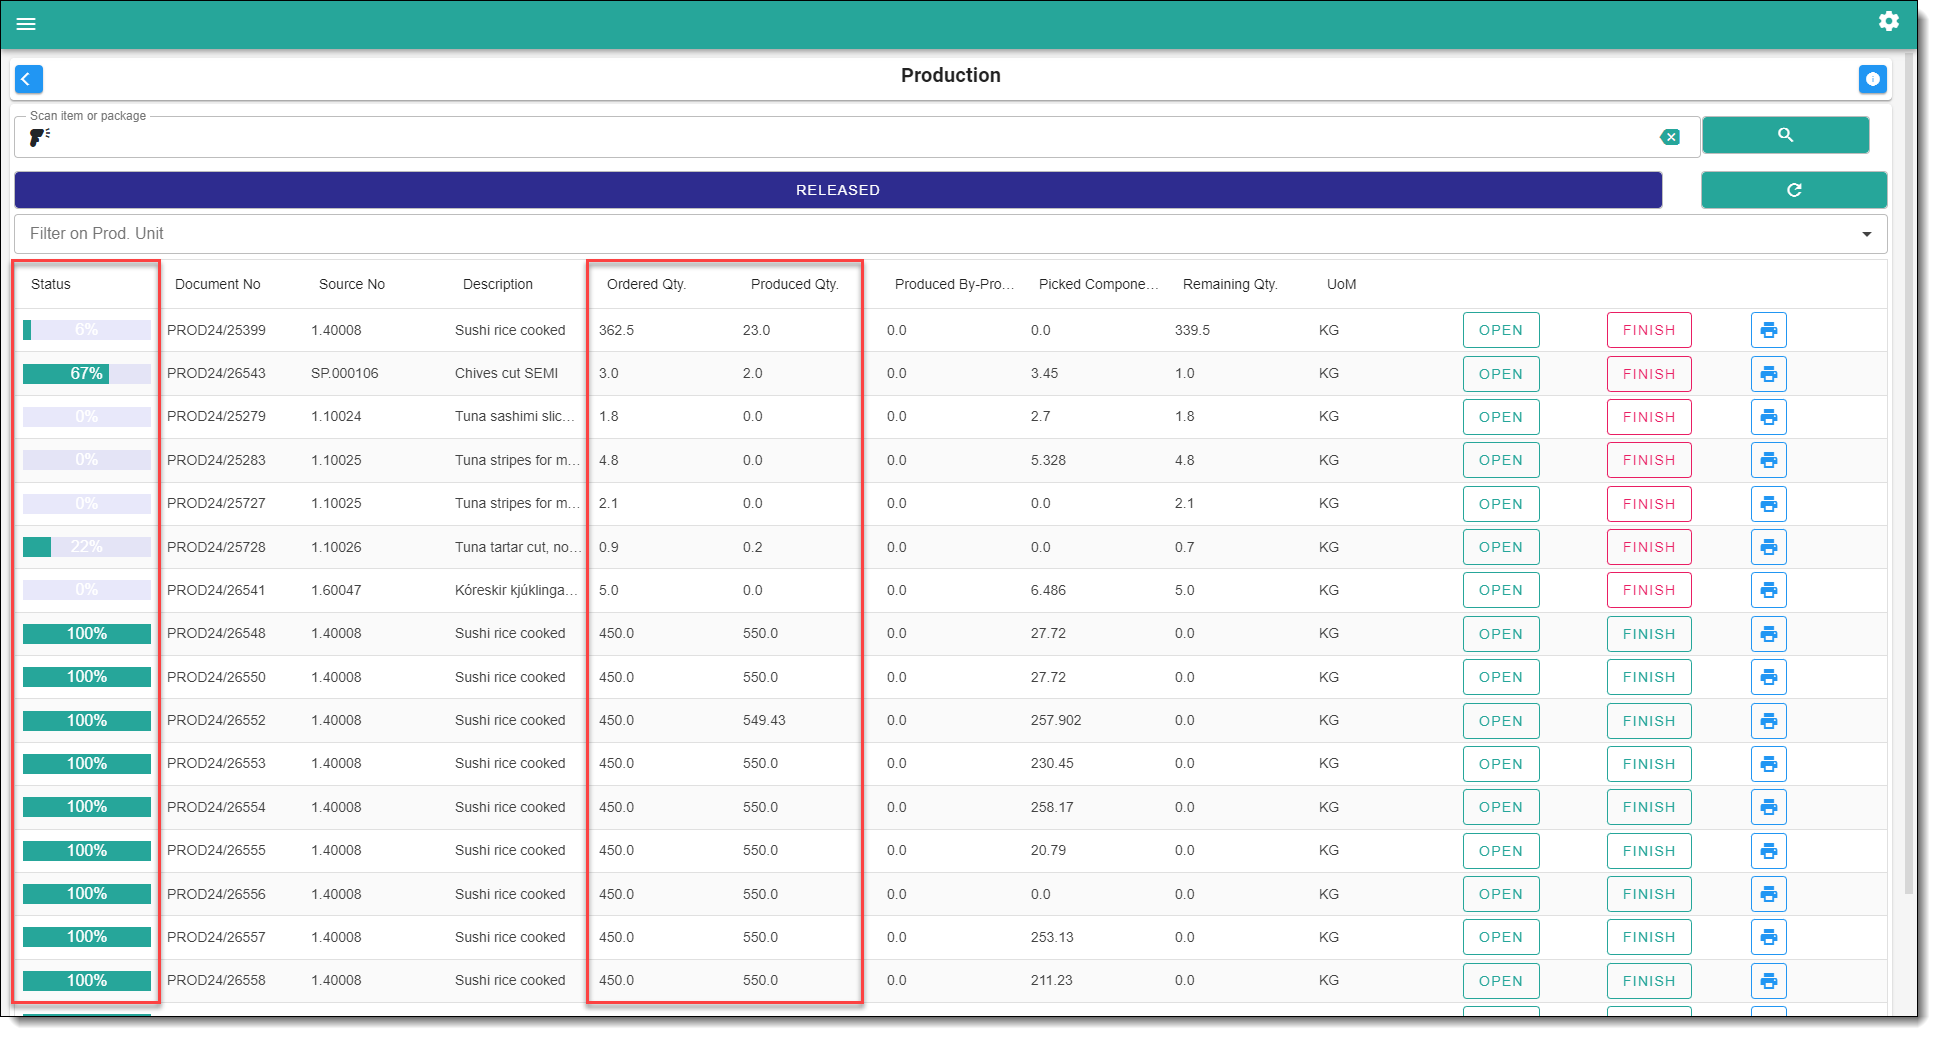
1. The task is then transfered to the "Released" section and is ready to be processed.
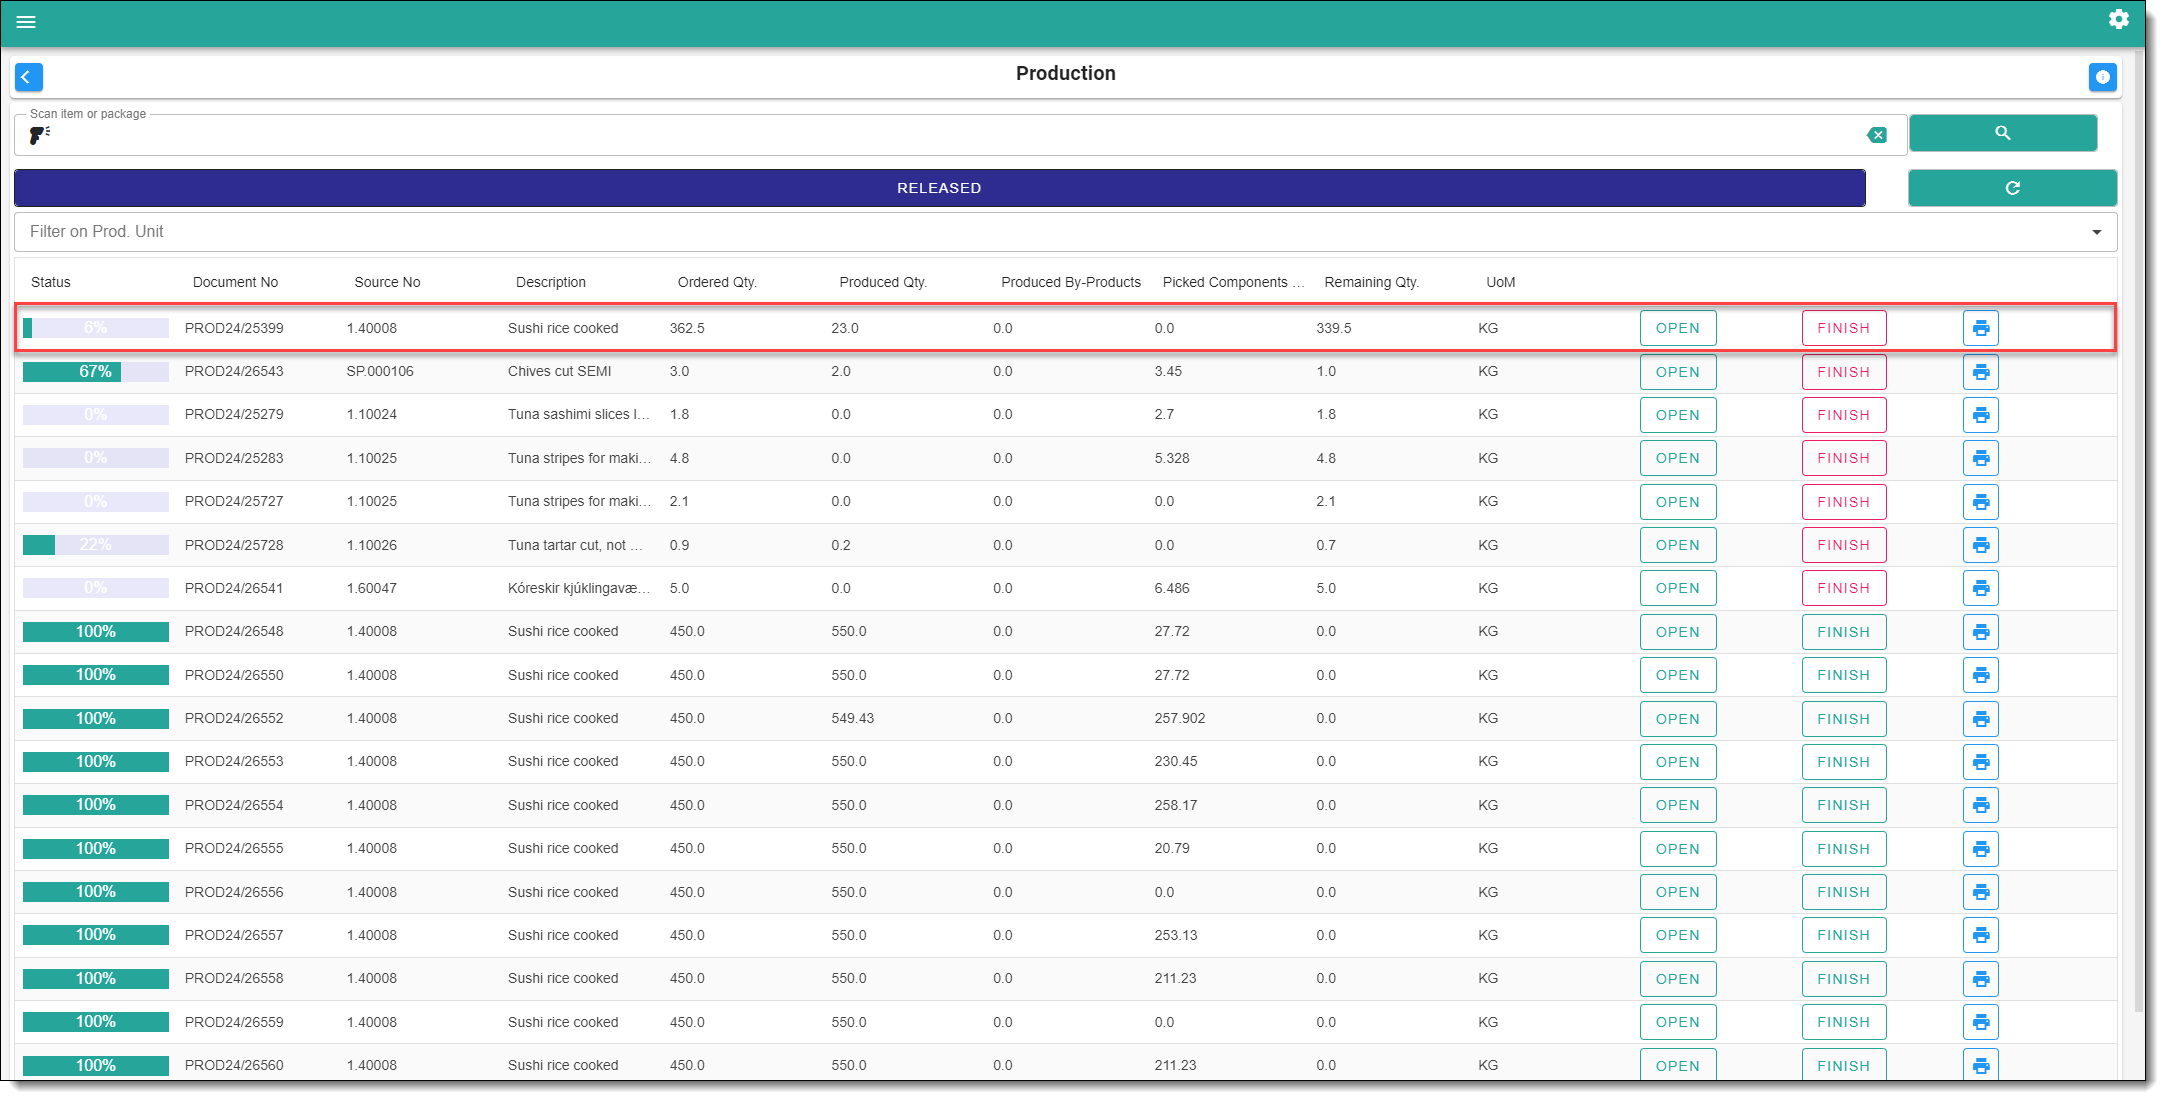
2. The status of the task updates accordingly to the Produced Qty.
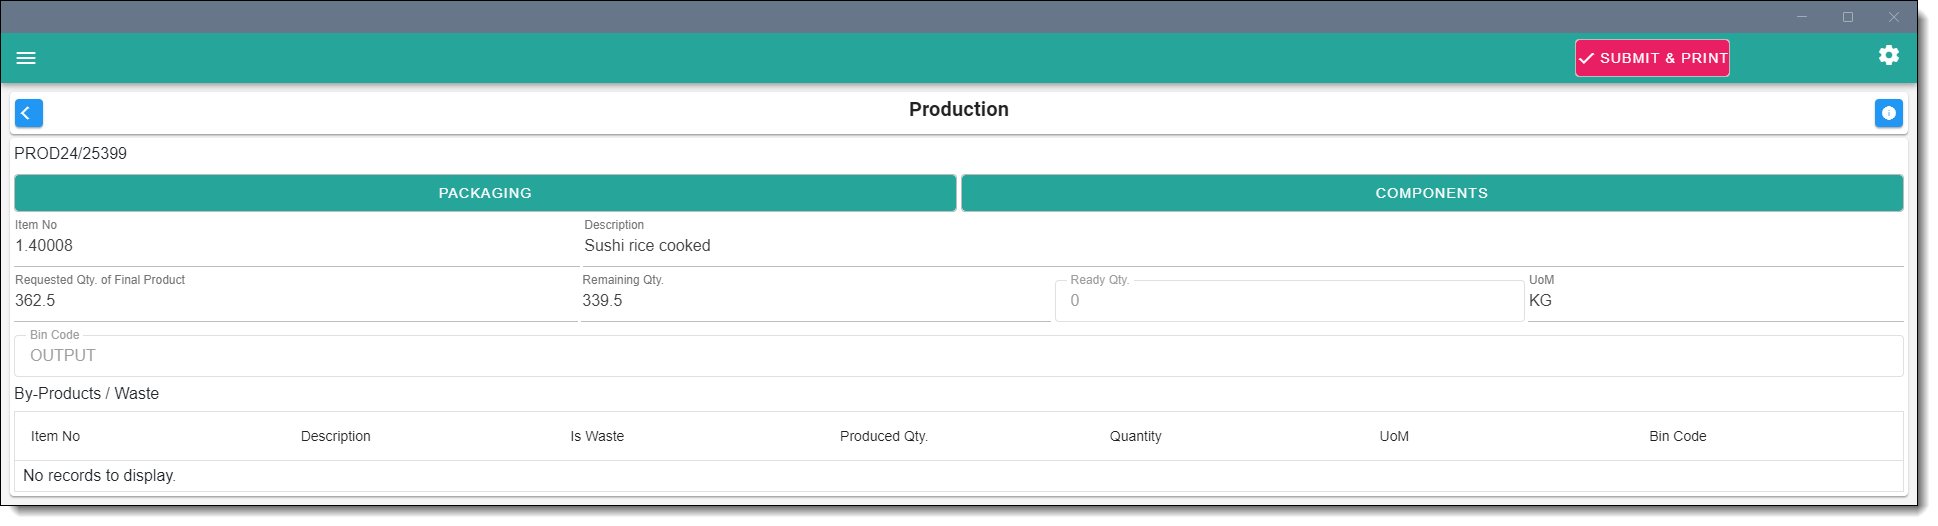
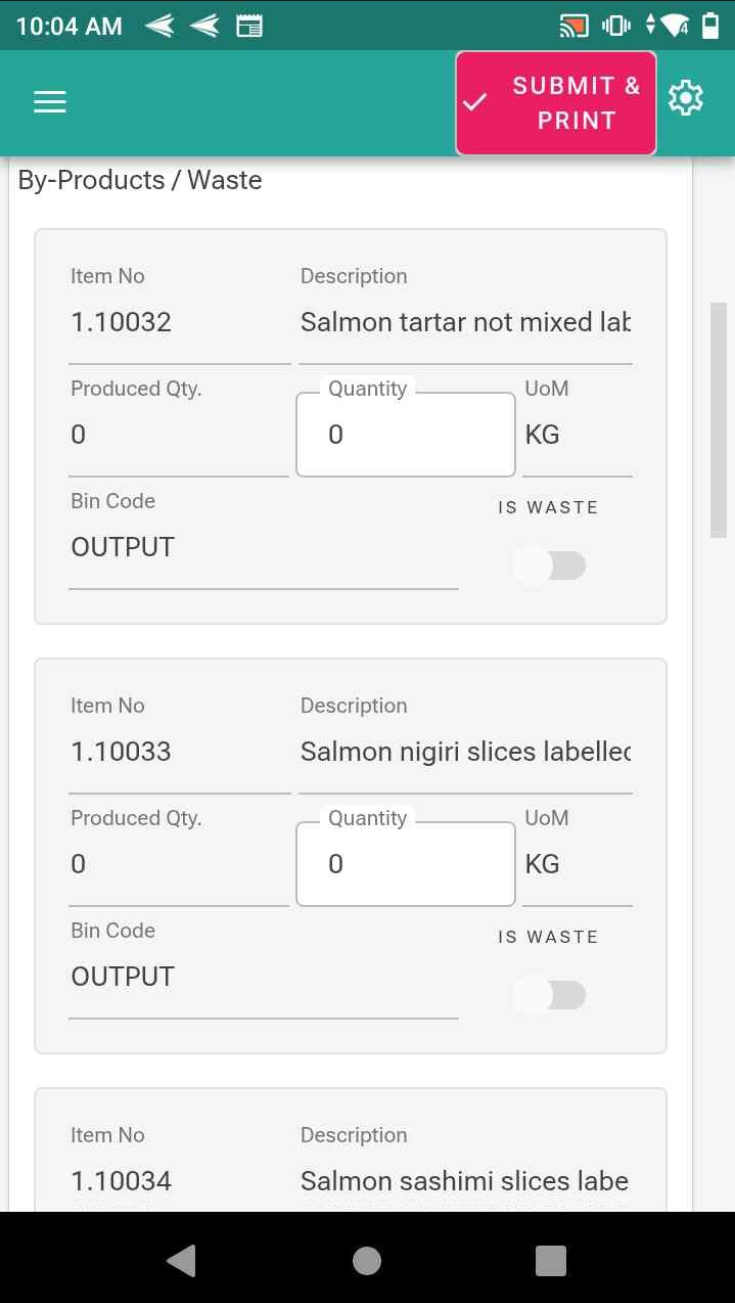
3. Once the production item has been prepared or partially prepared, the task can then be updated. Fill out the required fields such as Output Qty and Bin Code.
3.1. With specific orders, there could be by-product outputs, that can be used in other orders, or replanned for future usage.
3.2. After all information is filled in, user will need to click on the submit button and proceed with the confirmation.
4. User must hit Submit in order to update the task status. The task is now modified and the status is updated accordingly.
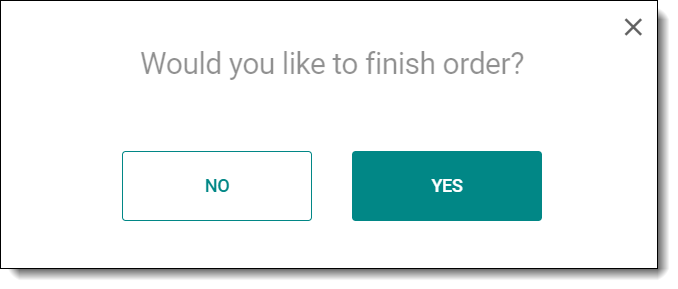
5. When the Remaining Qty has been produced and submitted, the system will prompt and ask the user if they would like to finalize the order.
6. The system will allow the user to edit the components used in cases where the Expected Qty ends up being higher or lower than initially determined. After pressing the save button, all of this data will go to Production order picking lines and will be saved until its status will be changed to Finished. That it will be saved and will be displayed by its information and data.
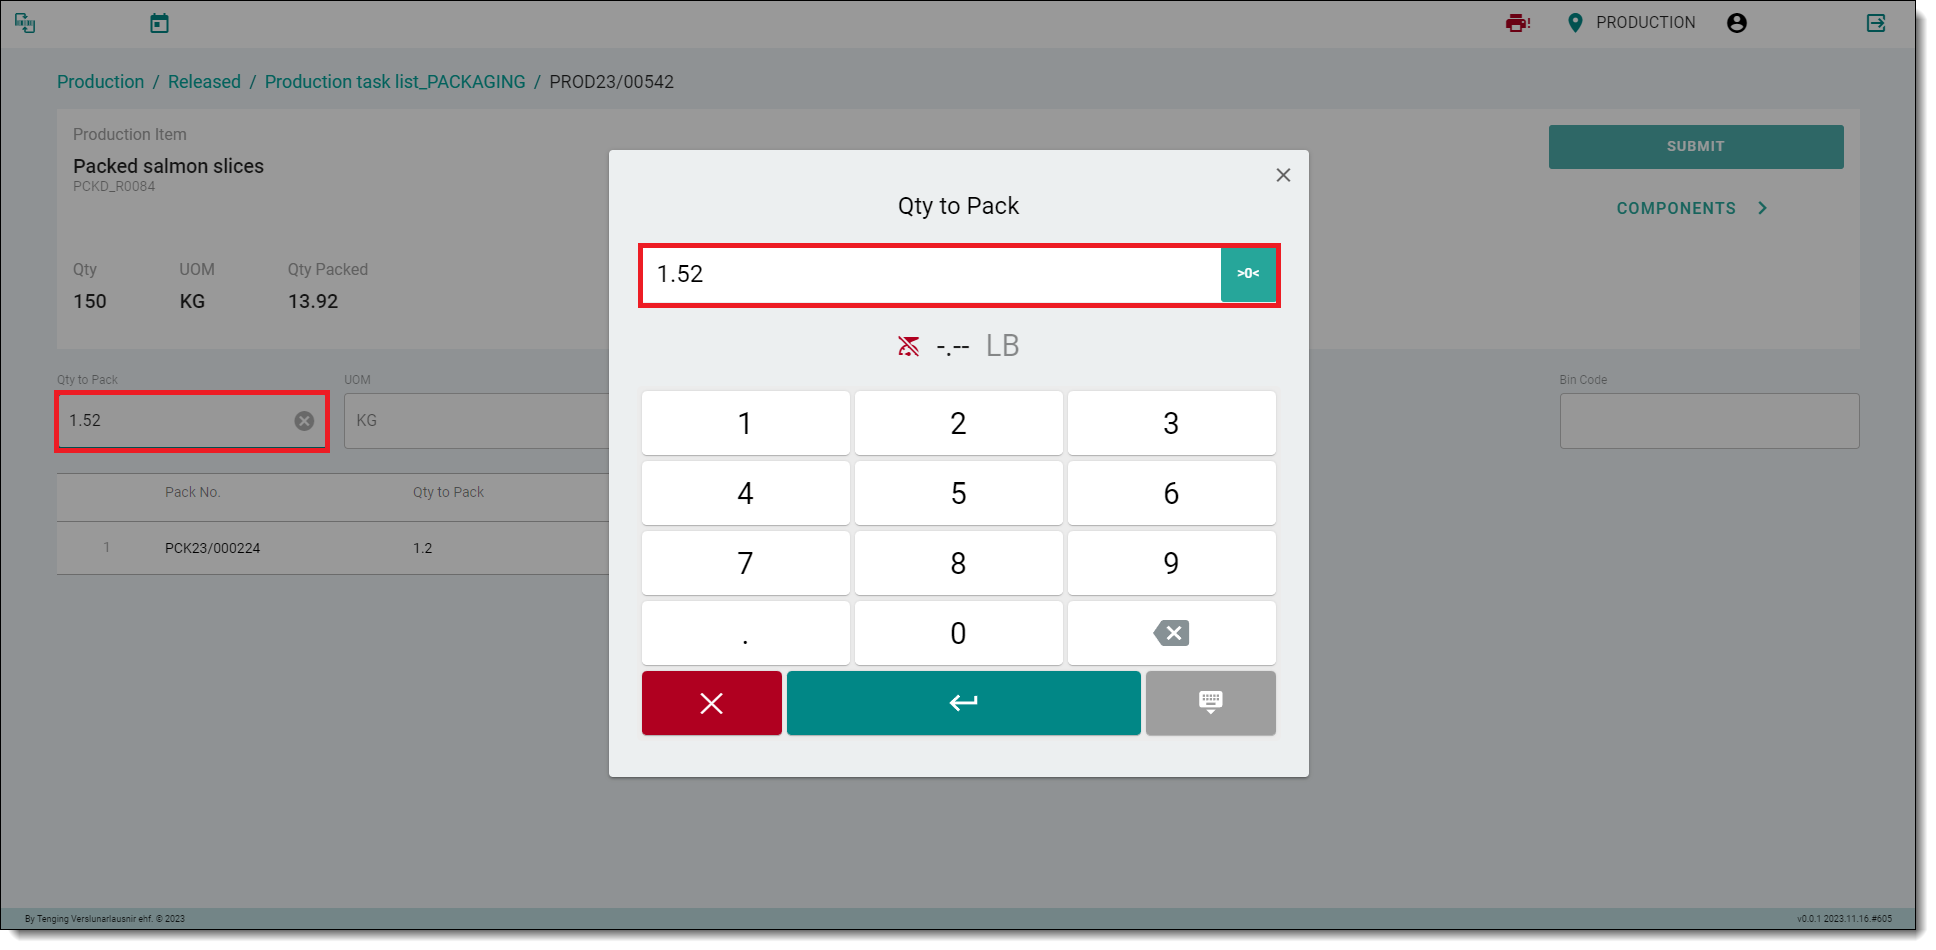
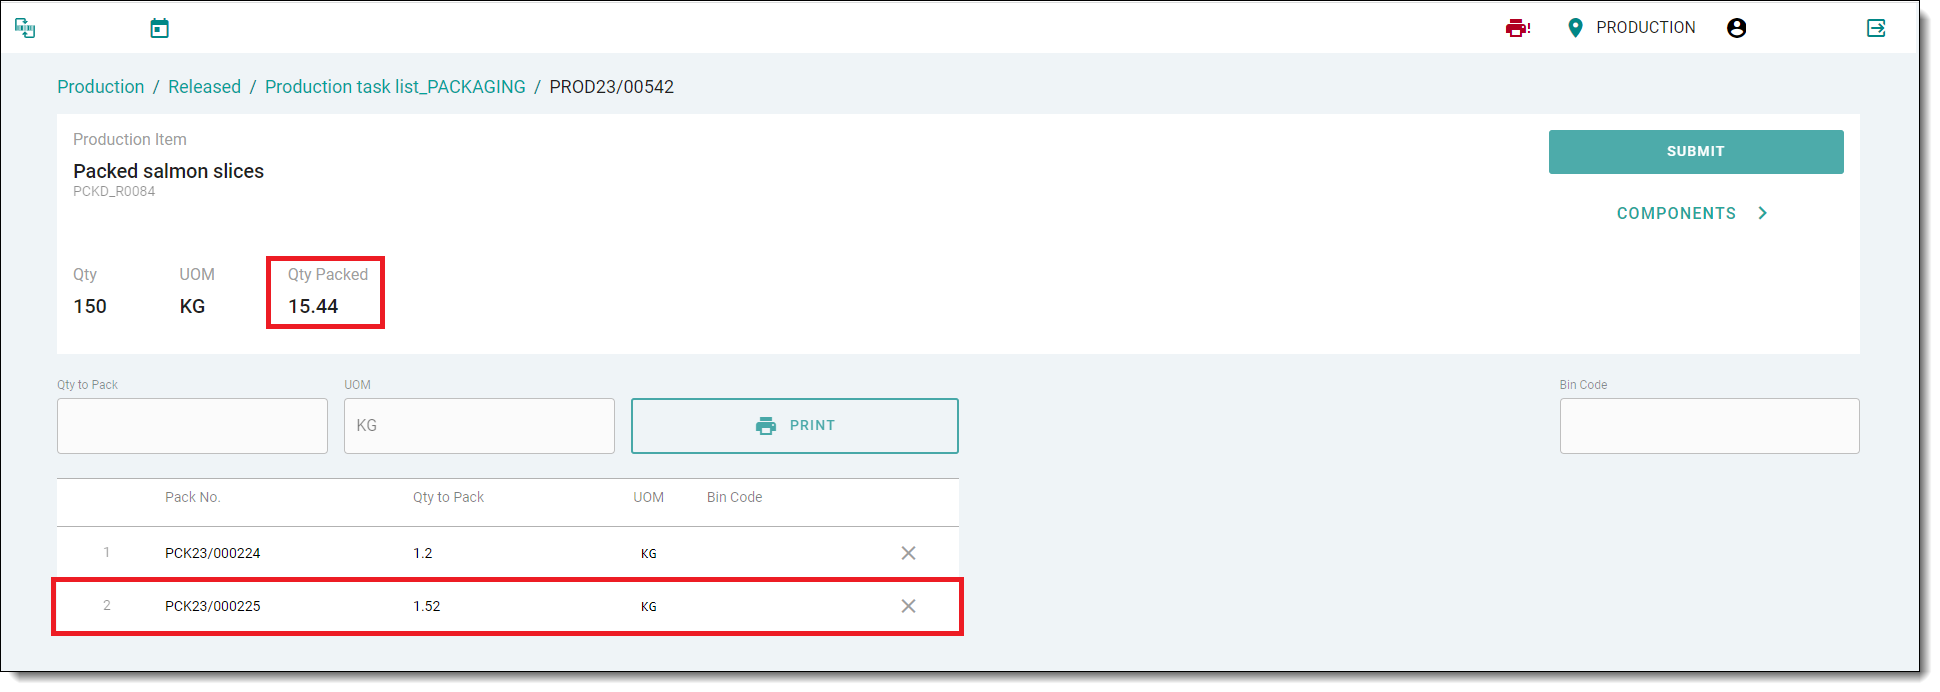
7. Weighing packaging tasks are performed differently:
8. Weighted quantity will be saved in weighing/packing entries.
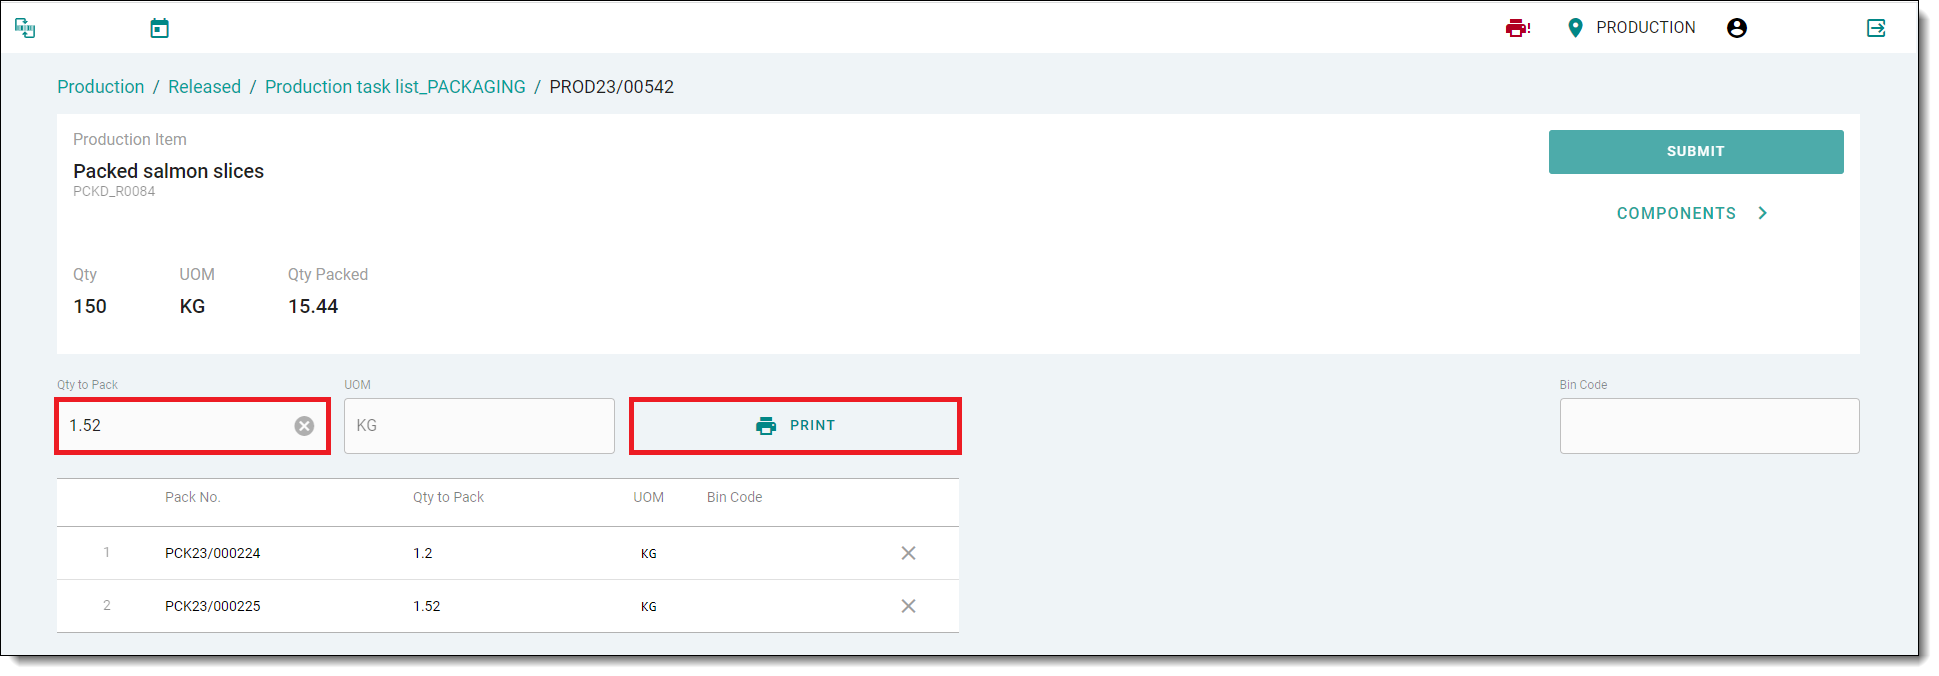
9. The user must click on the Print button to print a packaging label and create a new packaging entry for newly-weighted quantities.
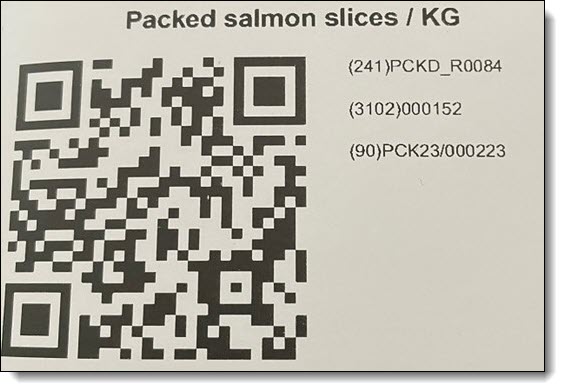
10. A packaging label with information abaut the packed product will be printed.
11. The list of packaging entries and the number of packed products will be updated.
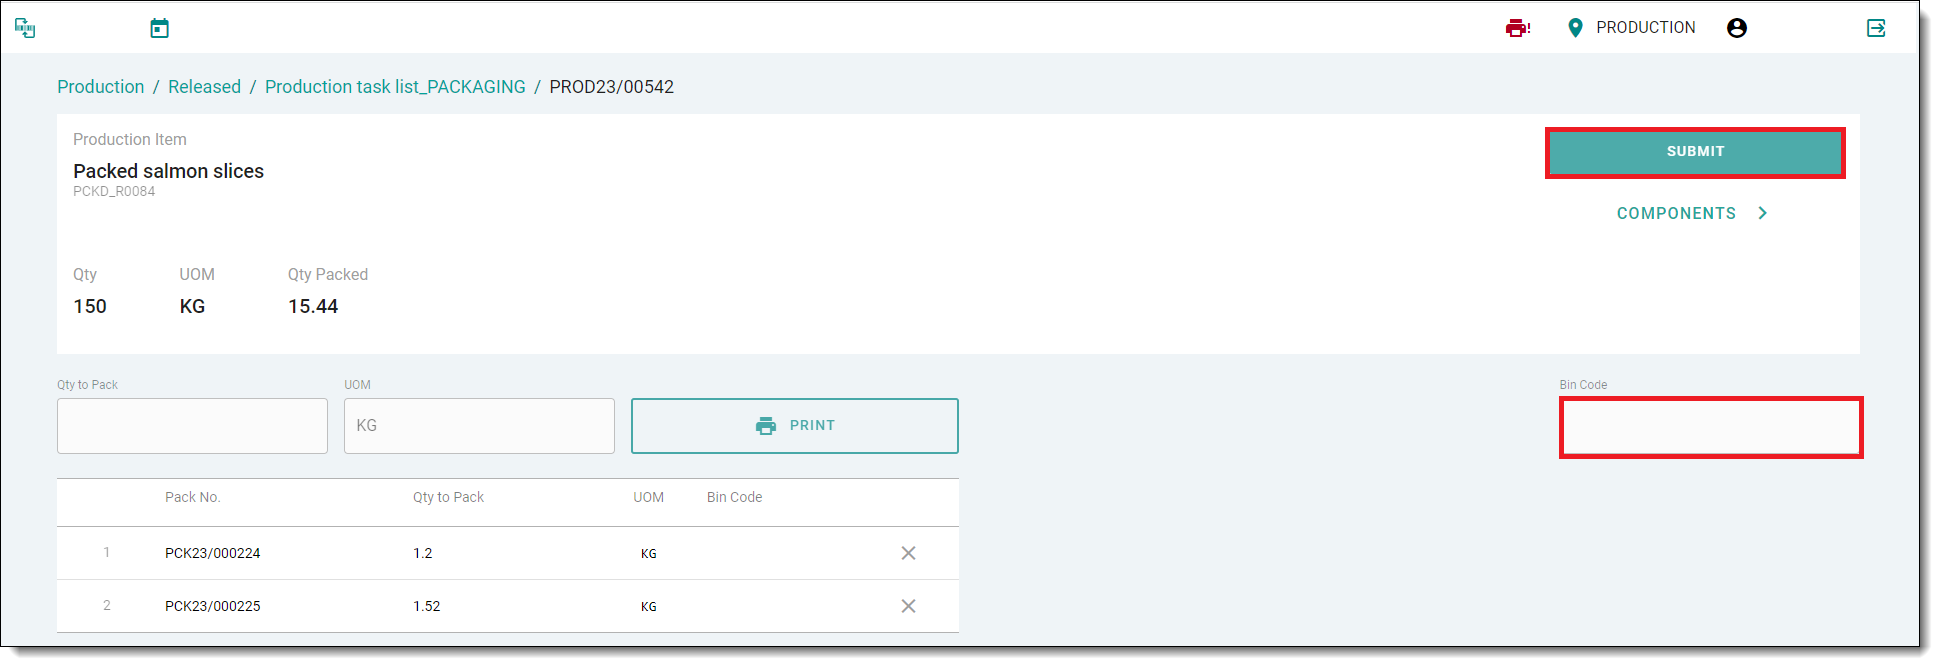
12. After completing the packaging process, scan the code of the Bin in which You are placing packages and hit the Submit button to send the document to the Business Central environment and post the already-packed amount of product.
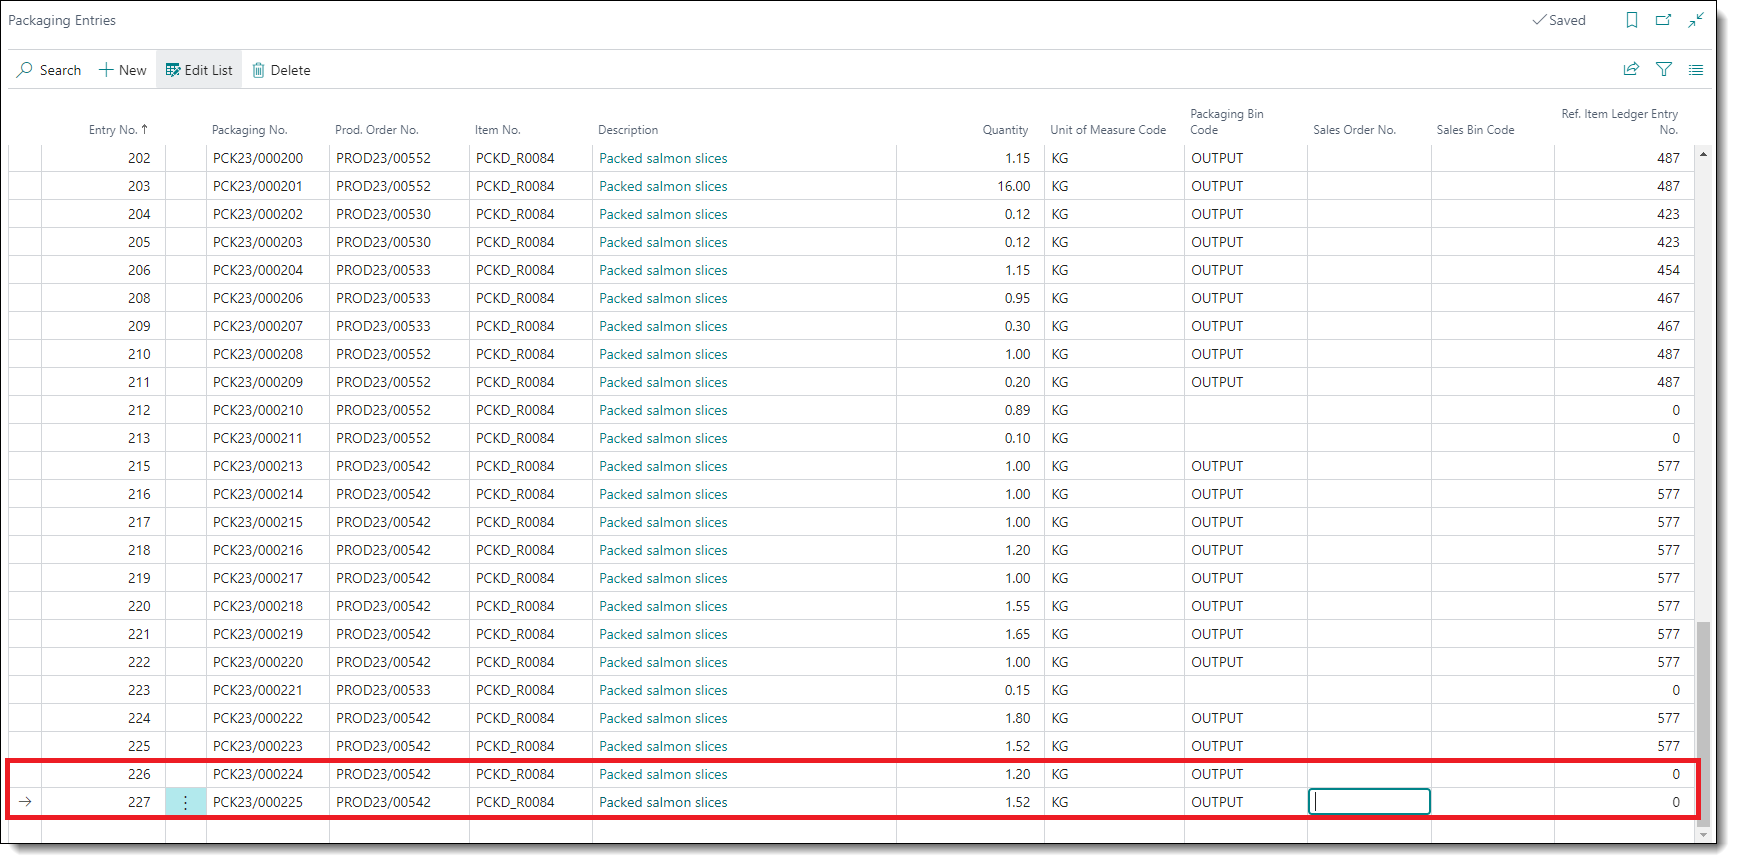
13. Packaging lines already created for the last packages are produced in BC can be seen below:
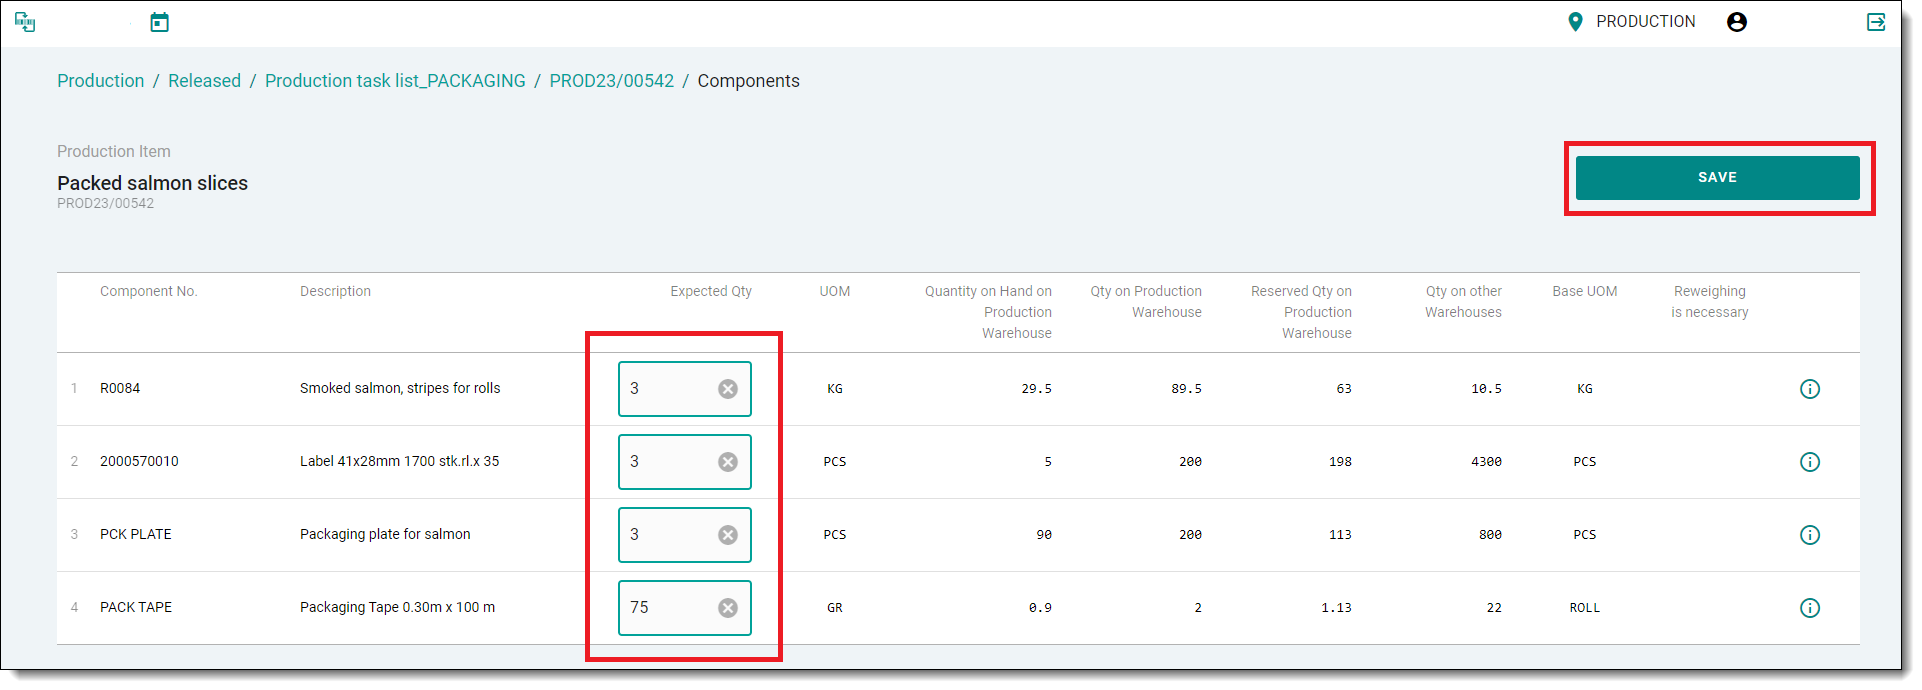
14. After the user clicks on Components in the Production/Packaging Order screen, they will be redirected to the componnet screen. If required, update quantities of components and hit the Save button to send to BC and to post any updates.
¶ By-Products Functionality
The By-Products Functionality allows Freshlot users to produce more than one product within a single production order.
A list of available by-products that can be produced is displayed in the Released Production Orders page in the Freshlot.
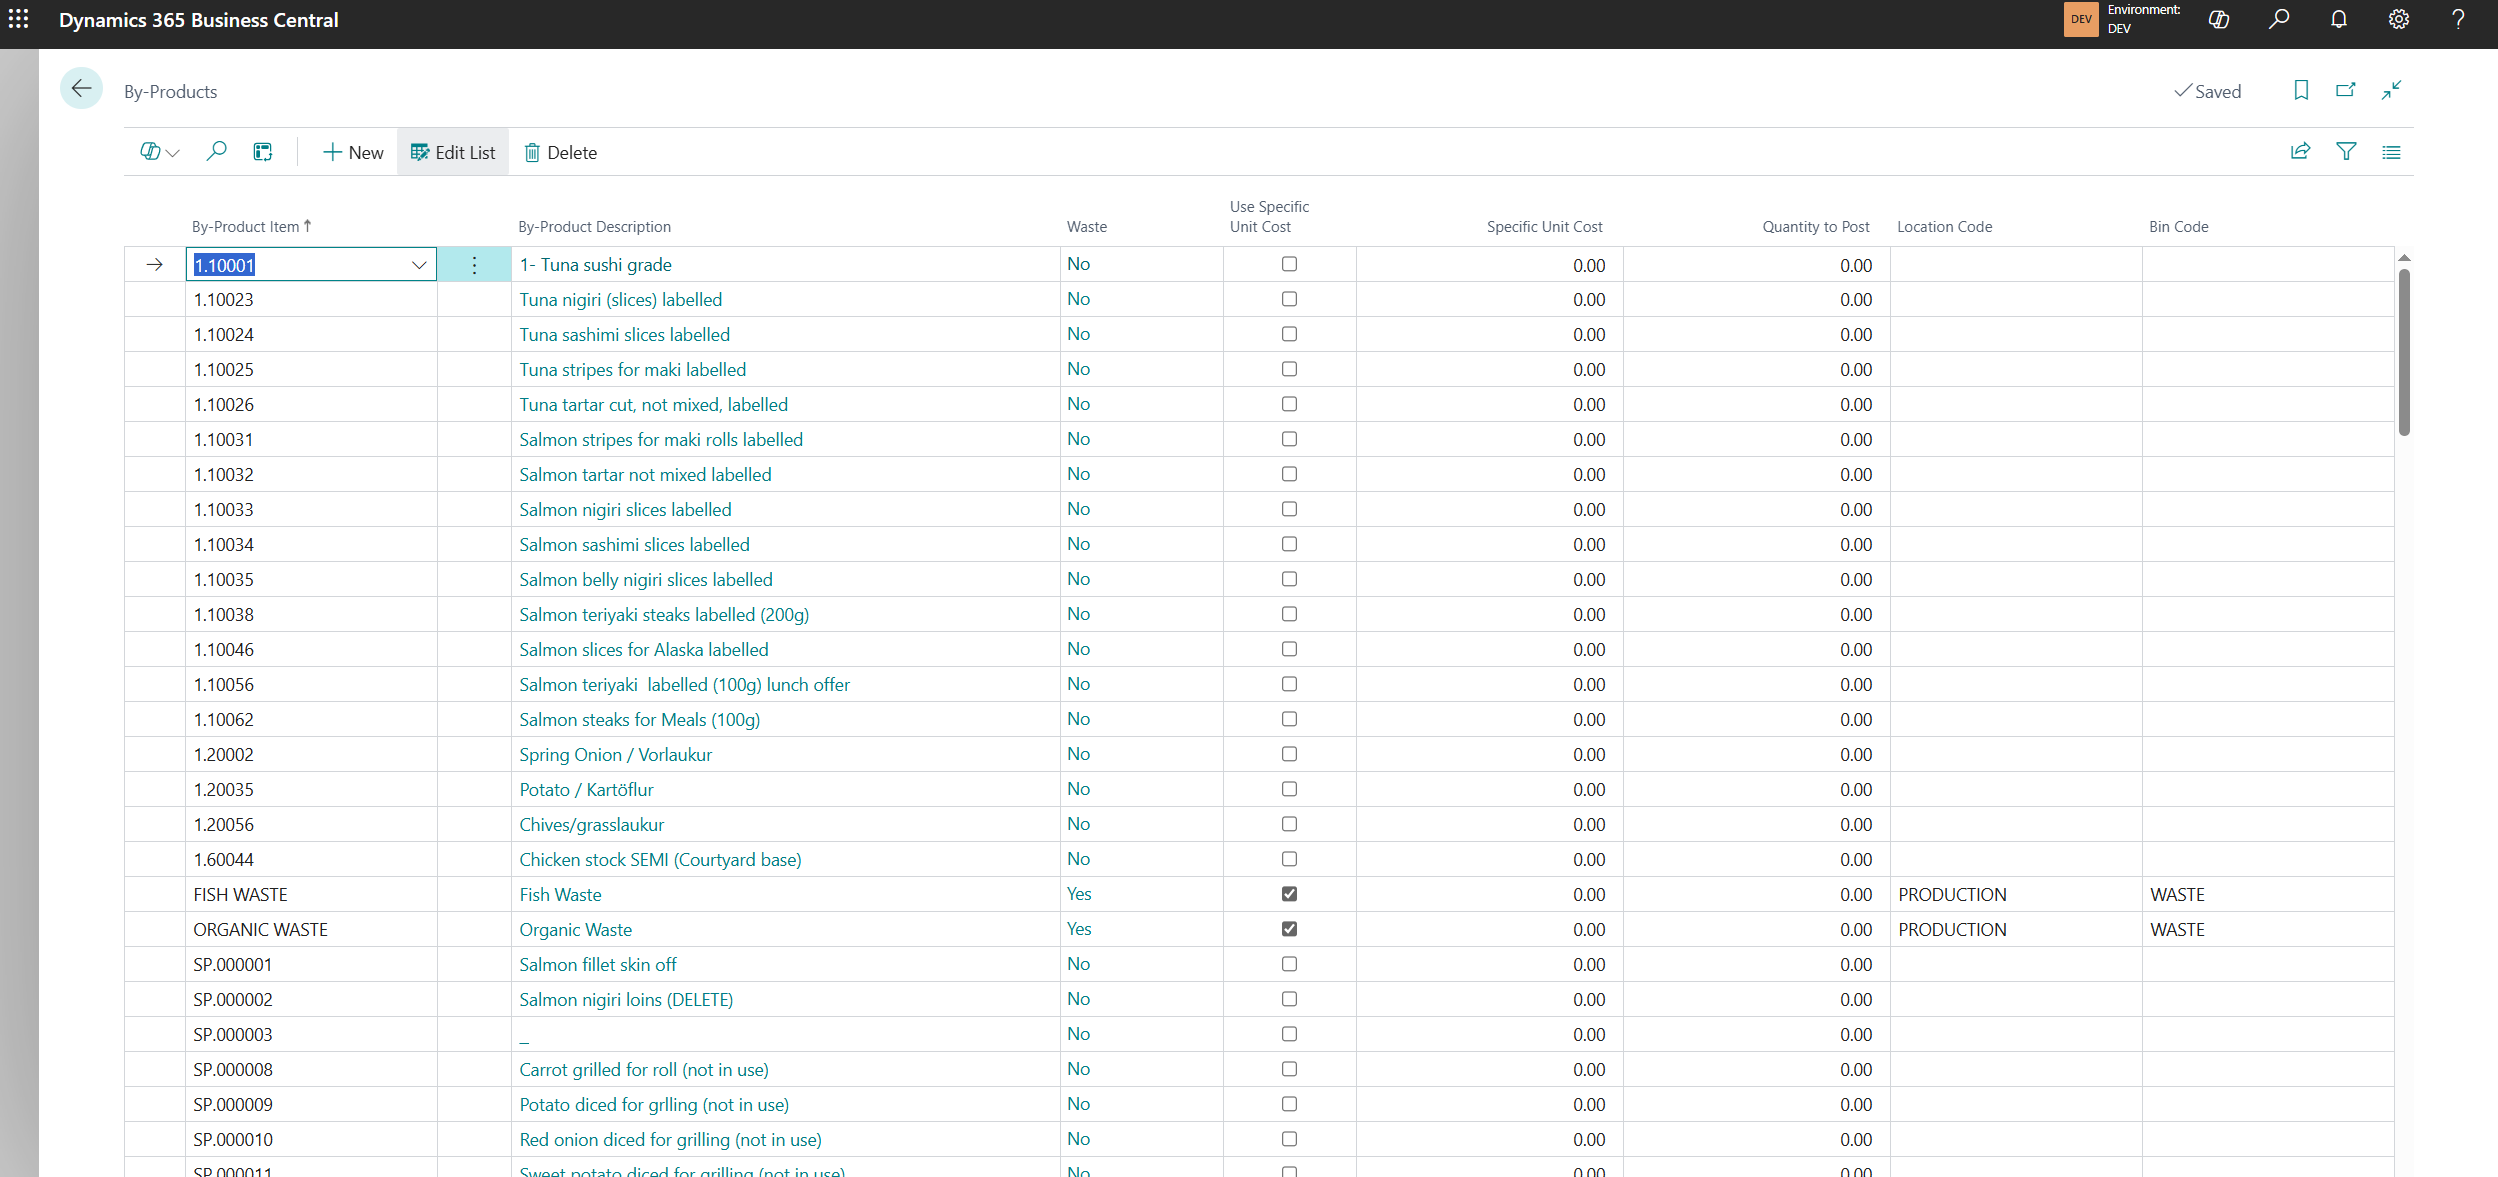
Products that can be produced as by-products need to be listed in the By-Products table:
- Users can mark by-products as waste. If a by-product is marked as waste and assigned to a production order, it will be automatically posted.
- A specific unit cost can be assigned to by-product.
- Additionally, a user can define a location code and bin code for the by-product. This ensures the produced item is placed in the specified location and bin upon posting.
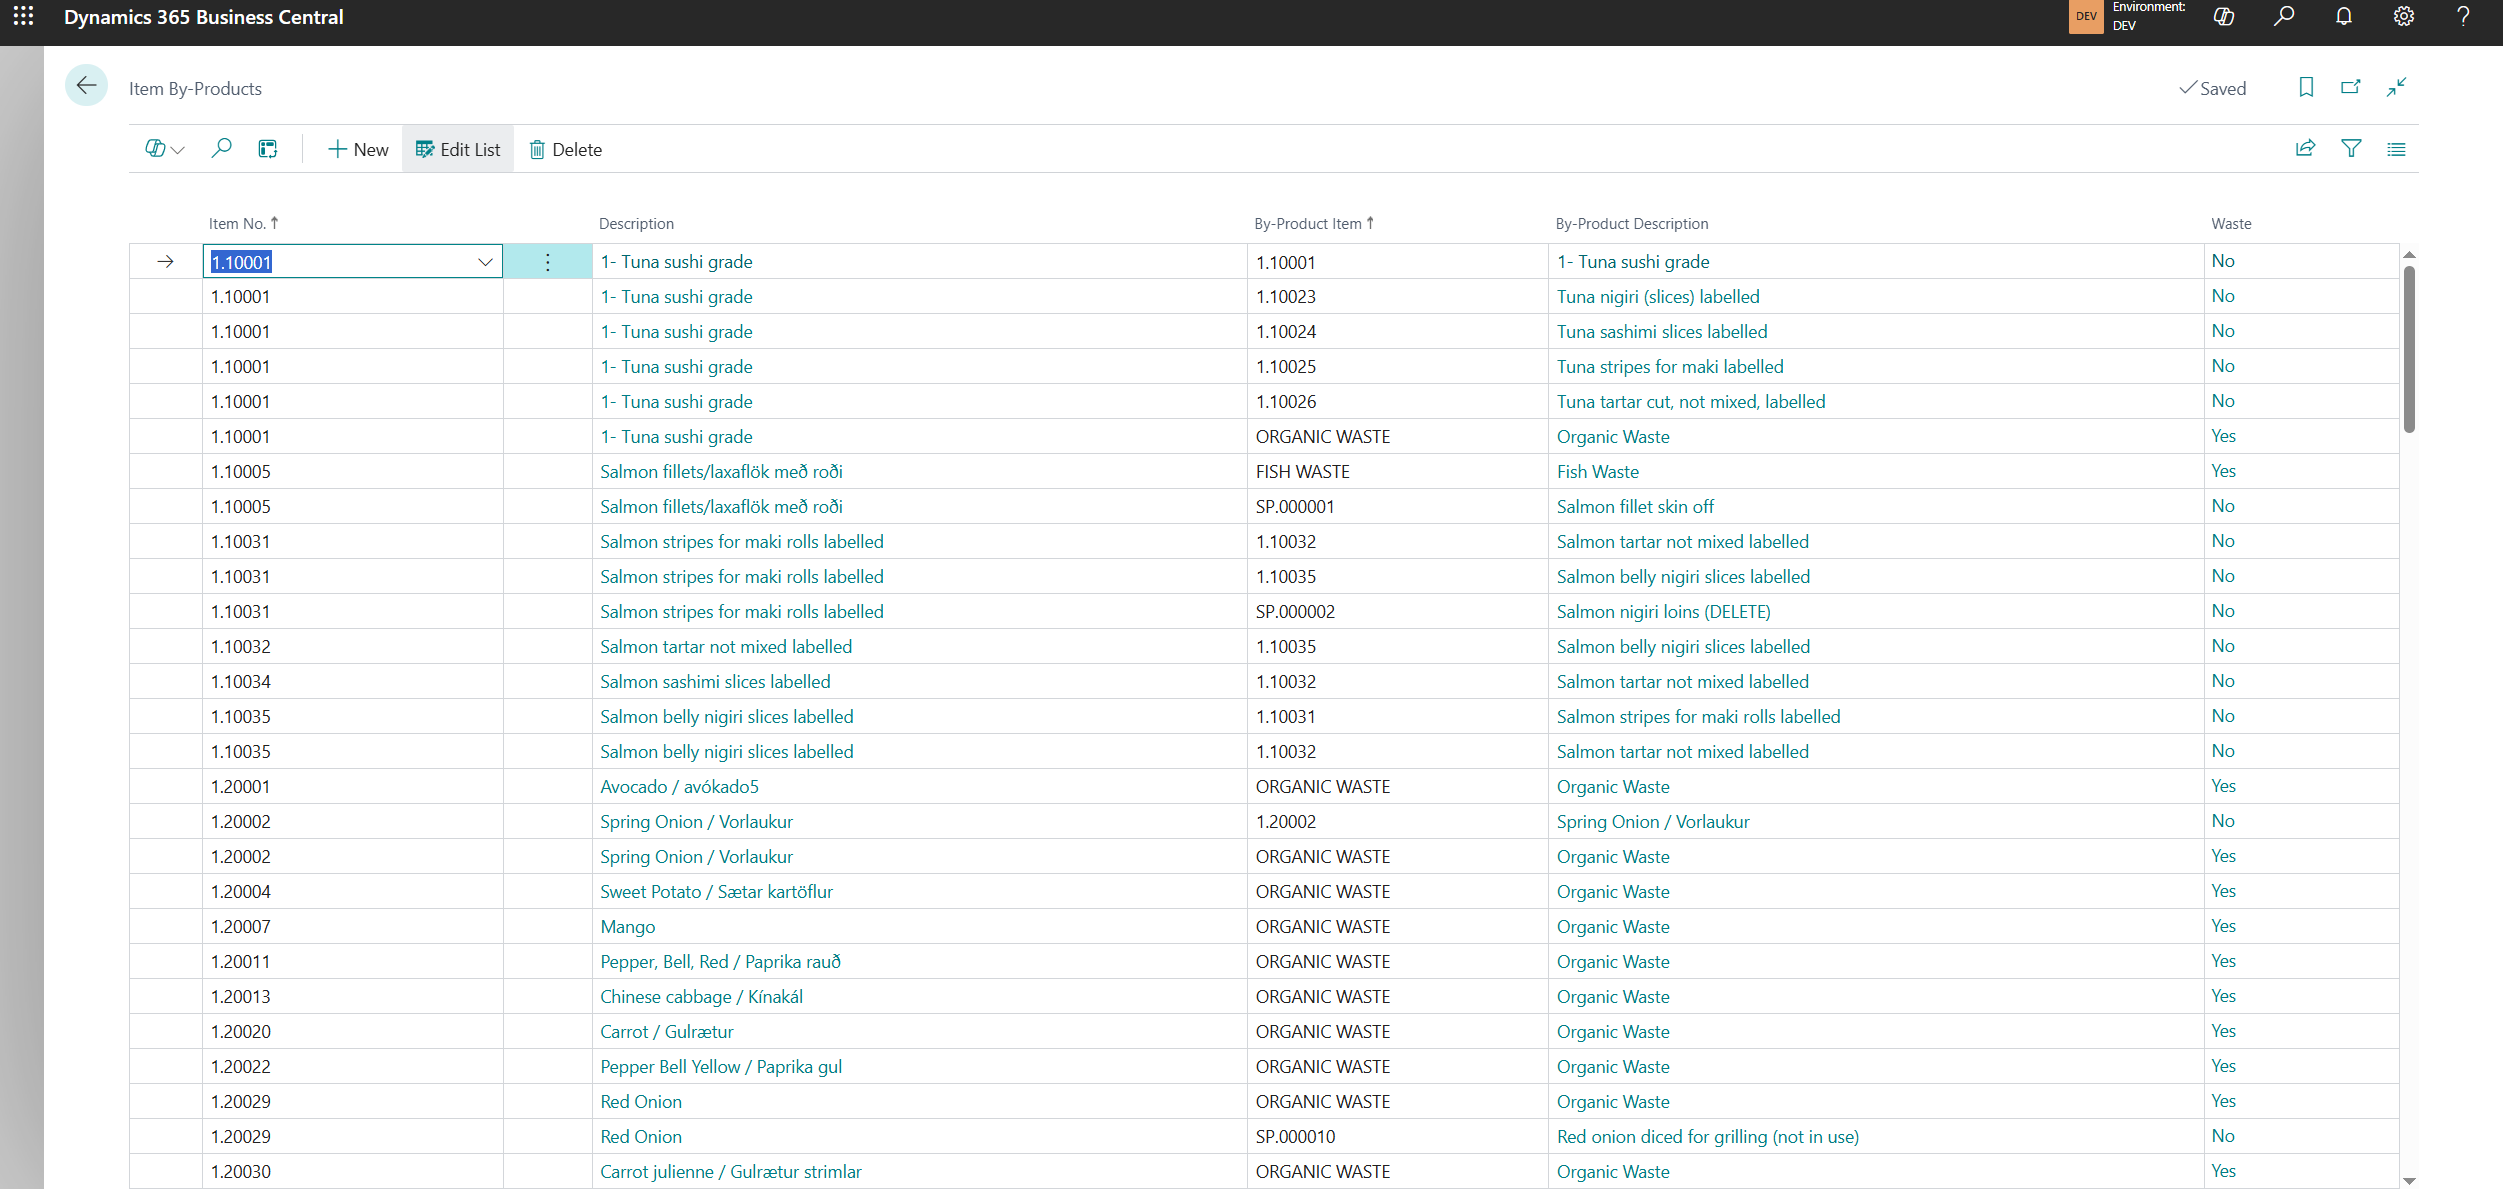
By-products need to be assigned to the raw material item, as they are produced from that material during the manufacturing process. This setup should be done in the Item By-Products table.
¶ Routings
Routings are used in the production orders to define how products are produced — essentially outlining the steps or operations required to manufacture an item.
Routings are assigned to the Item Card in the same way as BOMs. This ensures the correct routing steps are linked to the item during the production process.
Routing is assigned to each production order line based on the item. This means every item, including by-products, will carry its own routing.
It is highly recommended to assign the same routing to related items (e.g., those made from the same raw material or set up as by-products of one another) to ensure consistency in time and cost tracking.
-
Setup Time is a fixed time required to prepare for production. If by-products are produced, the setup time is divided proportionally among the lines.
-
Run Time is variable and depends on the produced quantity. It reflects the time needed to produce one unit of an item.
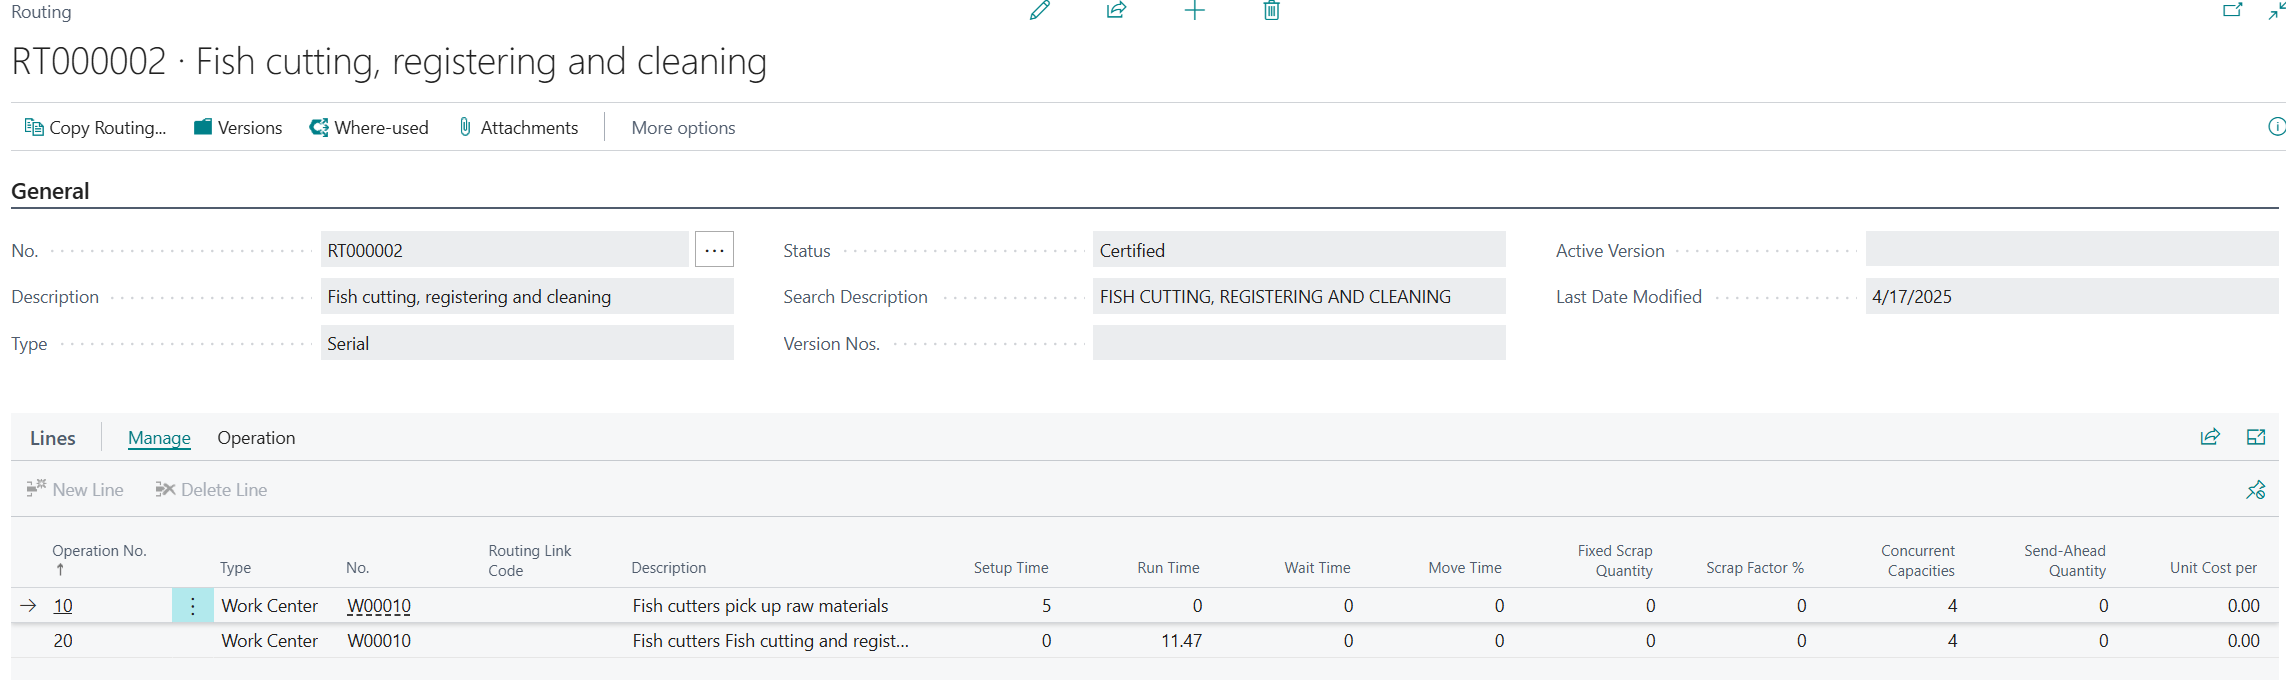
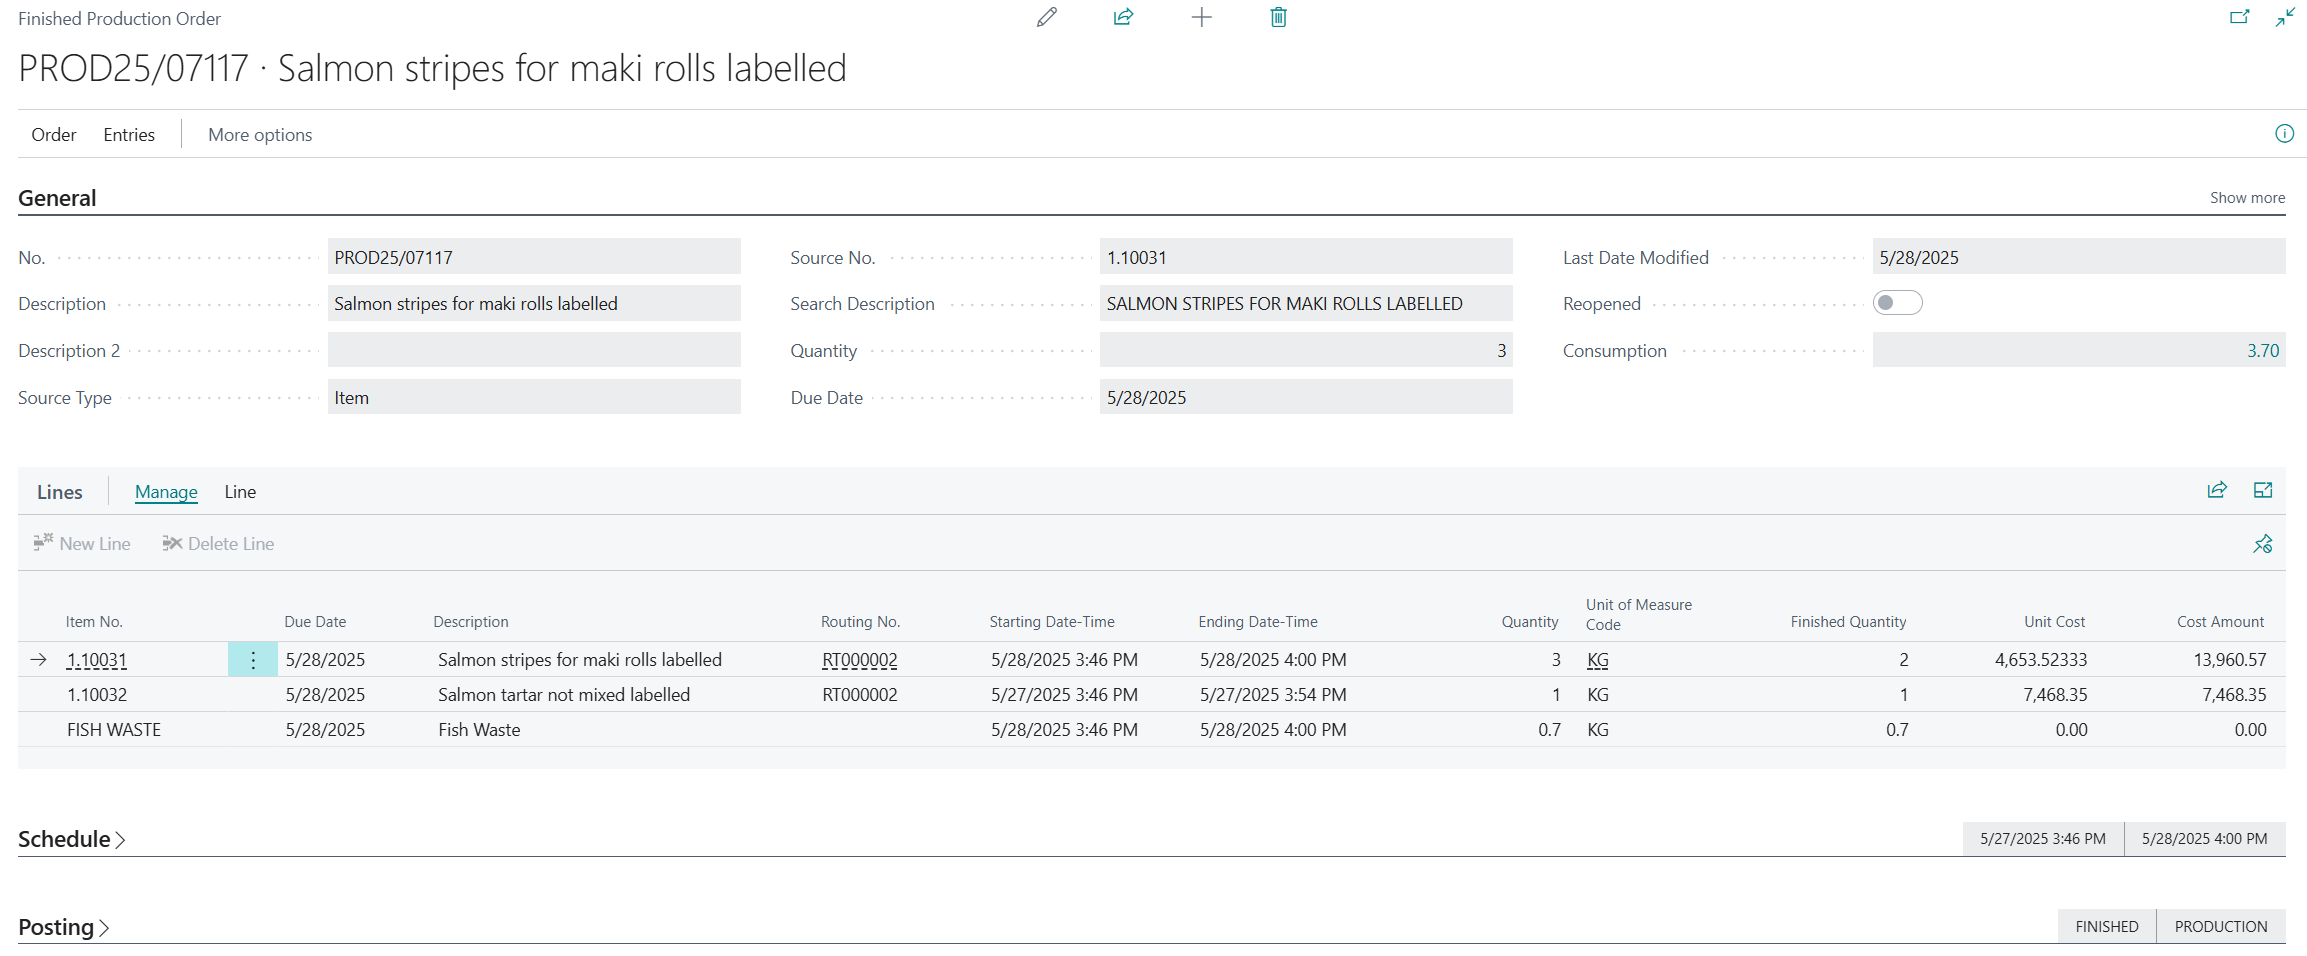
An example of a finished Production Order with assigned Routings
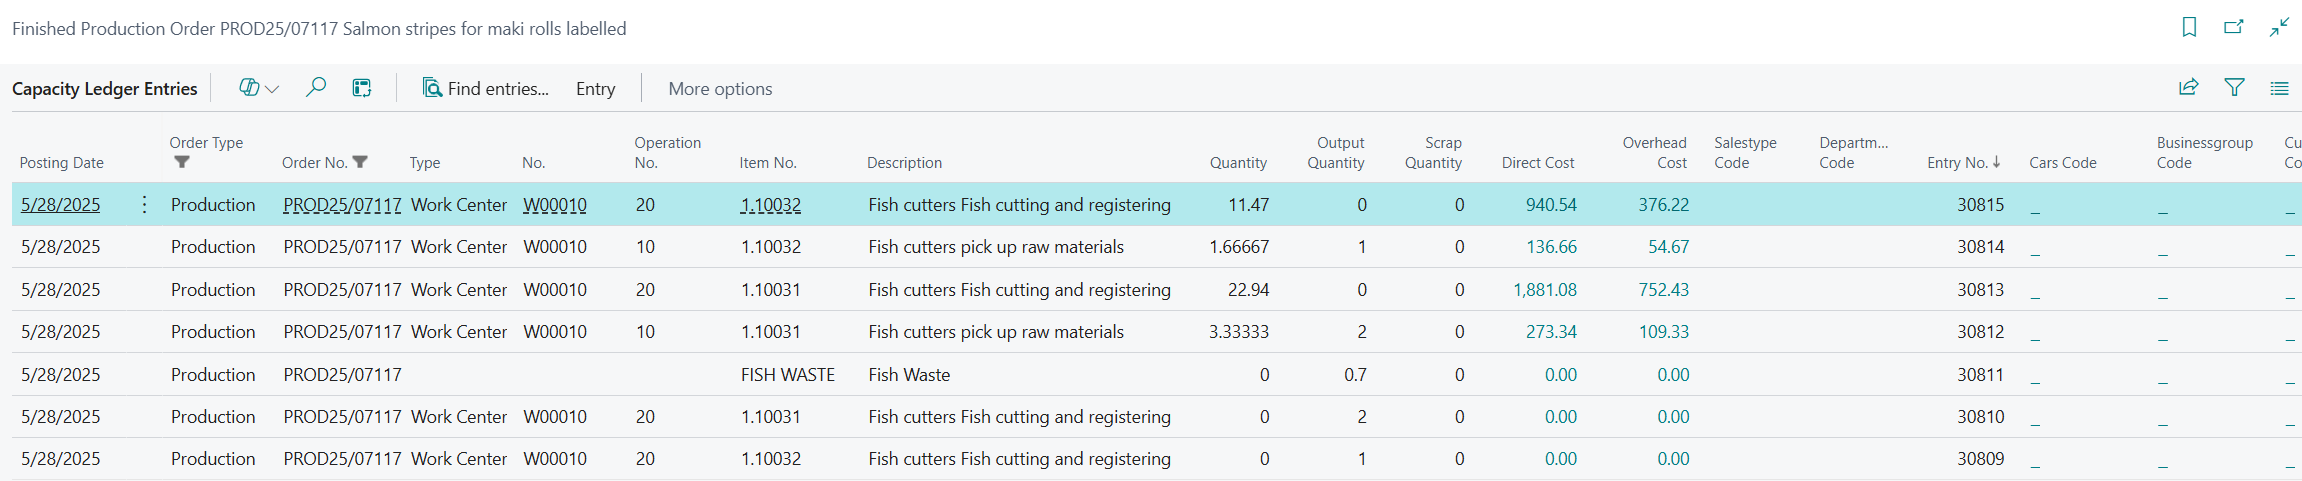
Capacity Ledger Entries are generated when Routings are assigned to a Production Order. The system calculates additional setup and run time costs, which are then included in the unit cost of the produced item.
Routings are automatically calculated and distributed using the Freshlot solution.
¶ Use-Case Diagram
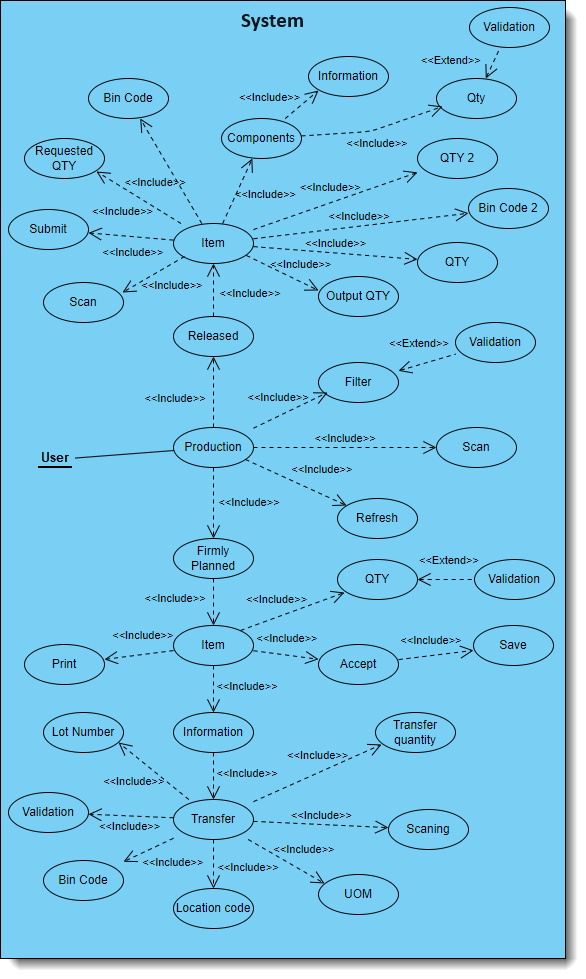
User navigation in the Production module
After successfully logging in, the user will be redirected to the main-menu page, from which they will need to select the Production module. The user will then land on the page with a firmly-pplaned list. The user can then choose from the different options on that page:
- Filtering - There is a filtering option that filters the list and validates information with the Business Central environment.
- Scanning function.
- Refresh function.
The user can proceed with the firmly-planned function and sort it by item, or perform the same with the released function and proceed the item as well.
When proceeding with the firmly planned item, the user can print out all the information regarding that field and can adjust the quantity - it will validated if its enough. The user can then save the information that was provided. If the user wishes to select the information button in the item, there will be a function to transfer that item as well as information about it. From there, the user can transfer the item to another lot or location, depending on their needs. The user will have to fill out information about the item transfer destination. The released function has similar options as information can be submitted and scanned transfers can be performed.